Information for Developers
See this page for the full code documentation.
How Tos
Create a shader
Each of the volume rendering techniques is containted into one Python file and the GLSL code must be specified in the setupShader() method of the class.
This code must be written as a string which is transmitted to the shader carrying out the volume rendering by using the vtk shader modification classes vtkUniforms and vtkShaderProperty. These strings replace on the fly tags in the format //VTK::SomeConcept::SomeAction in a shader template file. There is a defined list of tags that are suitable for different uses and the appropriate tag for the part of code you want to change in the shader must be specified in the Python class, as well as with the character string containing the code to replace. A more complete description of these tags can be found here. This is done in the following form:
replacement_code = """GLSL code"""
shader.AddFragmentShaderReplacement ("//VTK::SomeConcept::SomeAction", replacement_code)
Multiple tags can be used for one shader and they should all be specified in the setupShader() method.
The uniforms variables of the shader are defined as Python dictionnary and must be specified after the class declaration. There are 7 types of variables that can be added to the shader and they must respect this format, where <name> is the name used in the shader and <display name> is the name displayed in the UI :
Float
shaderfParams = { '<name>' : { 'displayName' : '<display name>', 'min' : <minimum value>, 'max' : <maximum value>, 'defaultValue' : <default value>}, \
                  '<name>' : { ...}, \
                   ... }
Integer
shaderiParams = { '<name>' : { 'displayName' : '<display name>', 'min' : <minimum value>, 'max' : <maximum value>, 'defaultValue' : <default value>}, \
                  '<name>' : { ...}, \
                   ... }
Point
shader4fParams = { '<name>': {'displayName': '<display name>', 'defaultValue': {'x': <x value>, 'y': <y value>, 'z': <z value>, 'w': <w value>}}, \
                   '<name>' : { ...}, \
                    ... }
Boolean
shaderbParams = { '<name>' : { 'displayName' : '<display name>', 'defaultValue' : <default value>, 'optionalWidgets' : [<name of optional parameter>, ...]}, \
                  '<name>' : { ...}, \
                   ... }
Range
shaderrParams = { '<name>' : { 'displayName' : '<display name>', 'defaultValue' : [<minimum value>, <maximum value>]}, \
                  '<name>' : { ...}, \
                   ... }
Transfer functions
shadertfParams = { '<name>' : { 'displayName' : '<display name>', 'defaultColors' : [[<First point x value>, <First point red value>, <First point green value>, <First point blue value>, <First point midpoint value>, <First point midpoint s Sharpness value> if color; <First point x value>, <First point opacity value>, <First point midpoint value>, <First point midpoint s sharpness value> if scalar opacity], ...], 'type' : '<'color' or 'scalarOpacity'>'}, \
                  '<name>' : { ...}, \
                   ... }
If the original values of the volume are to be keeped, the ‘defaultColors’ must be defined as : 'defaultColors' : [] .
Each volume can only have one of each (color and opacity) transfer functions.
This parameter controls the two transfer functions of the principal volume.
Volume
shadervParams = { '<name>' : { 'displayName' : '<display name>', 'defaultVolume' : <id of the volume>, 'transferFunctions' : {<transfer functions>}}, \
                  '<name>' : { ...}, \
                   ... }
If mutliple volumes are needed, make sure that the ids are differents. By default, you should use 1, 2, 3, … as ids. If no transfer function are defined, the default ones of the volume will be used.
Limitations
Multiple volumes
Currently the use of multiple volumes in a shader is not supported. Multiple volumes can be added into the scene by using the “volume” parameter but we have not been able yet to find how to link the secondary volumes to the shader.
Editing existing shaders
We are still exploring the different approaches to find the ideal way to integrate this feature into the UI. For now, the only thing allowed in this feature is to add a section of code and not to modify the ones that are already present into the python class. To manually modify the file containing the current shader, it can be duplicated or opened by clicking on the “…” button and then “Duplicate” or “Open” in the “Custom shader” section :

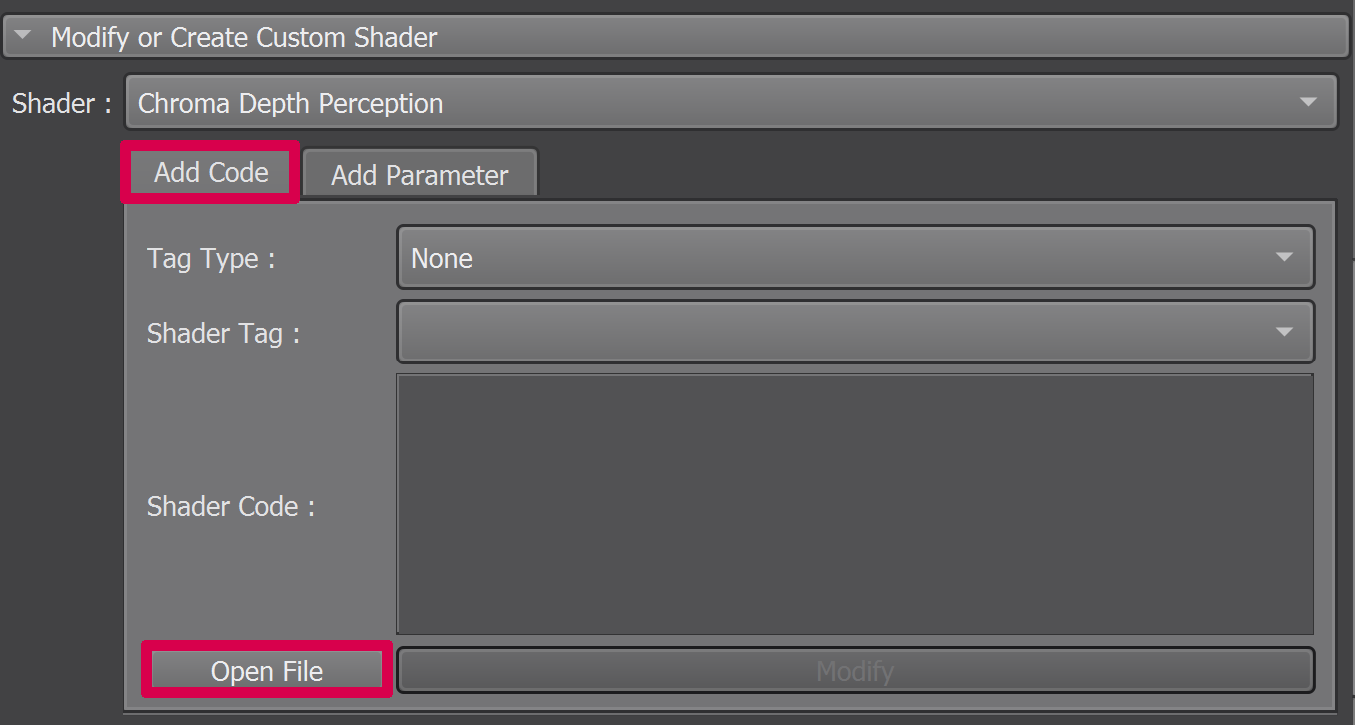
or on the “Open File” button in the “Modify or Create Custom Shader” section :