Tutorials
Rendering a volume
Open the “Data” section.
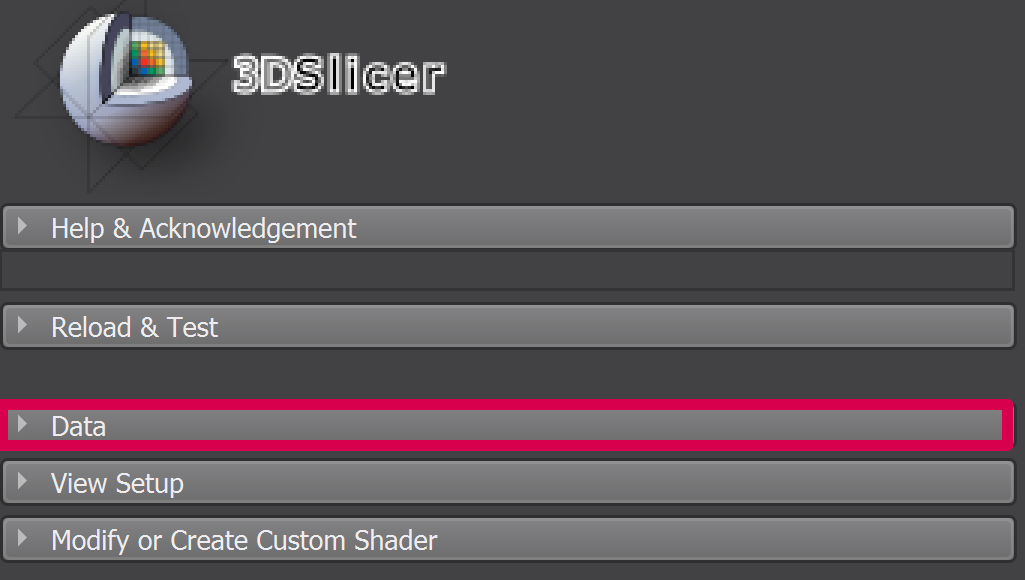
Select your volume in the comboBox.

Open the “View Setup” section.
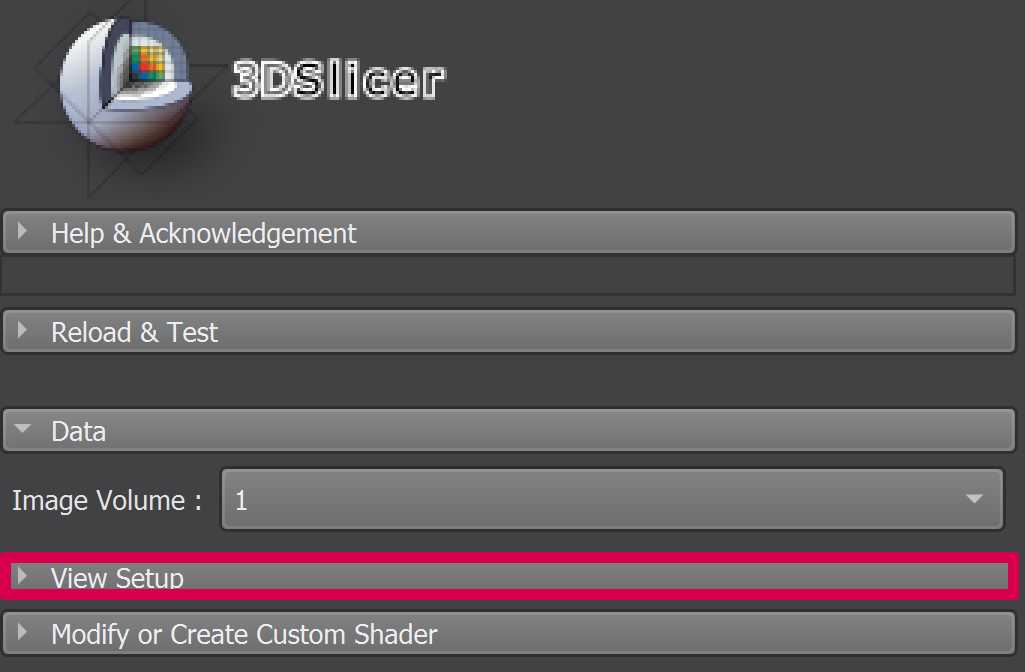
Apply the volume rendering to your volume by clicking on the “Volume Rendering” checkBox.

Applying a shader to a volume
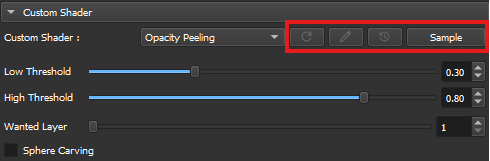
Open the “Custom Shader” section.
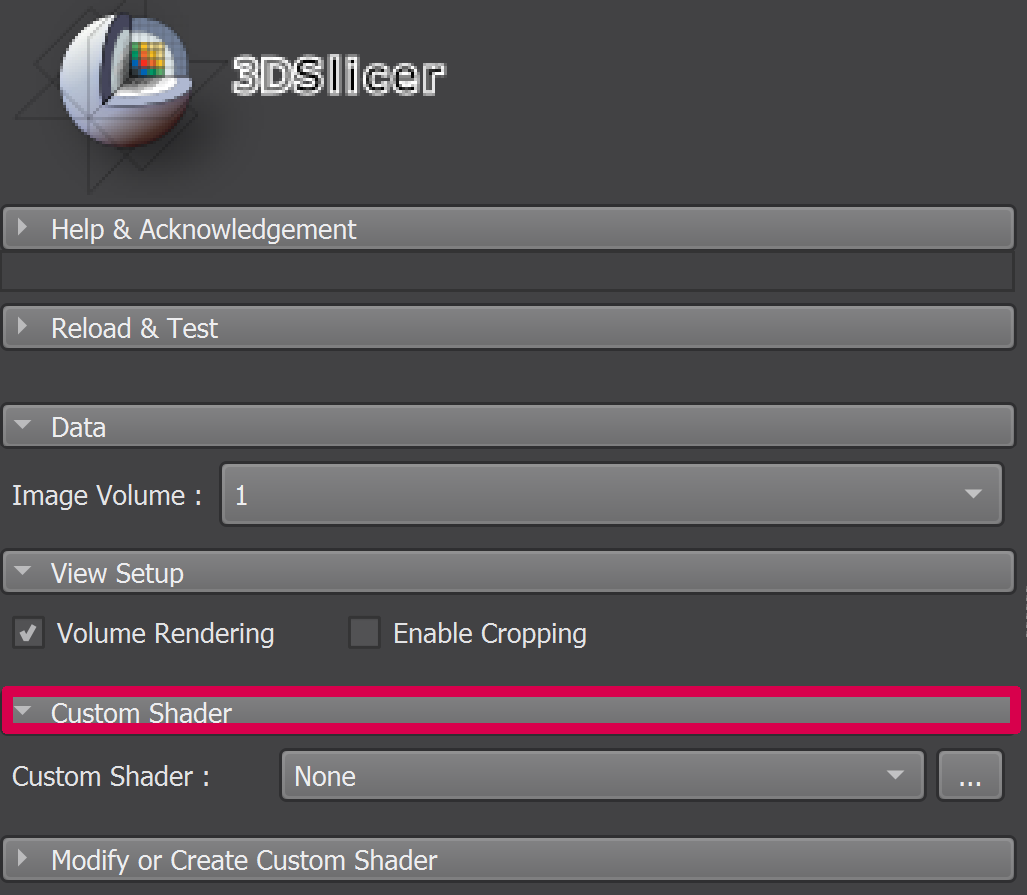
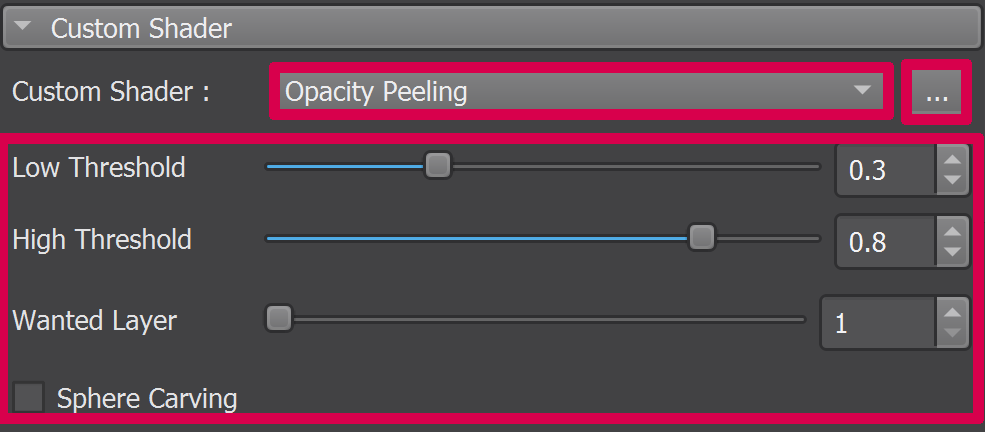
Select the shader of your choice in the comboBox.
Adjust the different parameters. A detailed description on how to use each shader is located here.
If you are currently developping the shader you can click on the “…” button in order to reload, duplicate or open the shader :
- Reload the shader by clicking on the “Reload” button. This will reload all the new functionnalities added to the file containing the shader.
- Duplicate the shader by clicking on the “Duplicate” button. This will create a duplicate class of the class containing the shader.
- Open the shader by clicking on the “Open” button. This will open the class containing the shader in your favorite editor.
Implemented shaders
This section contains a detailed description on how to use each of the techniques implemented in the module, and require to perform steps 1-3 of the precedent section.
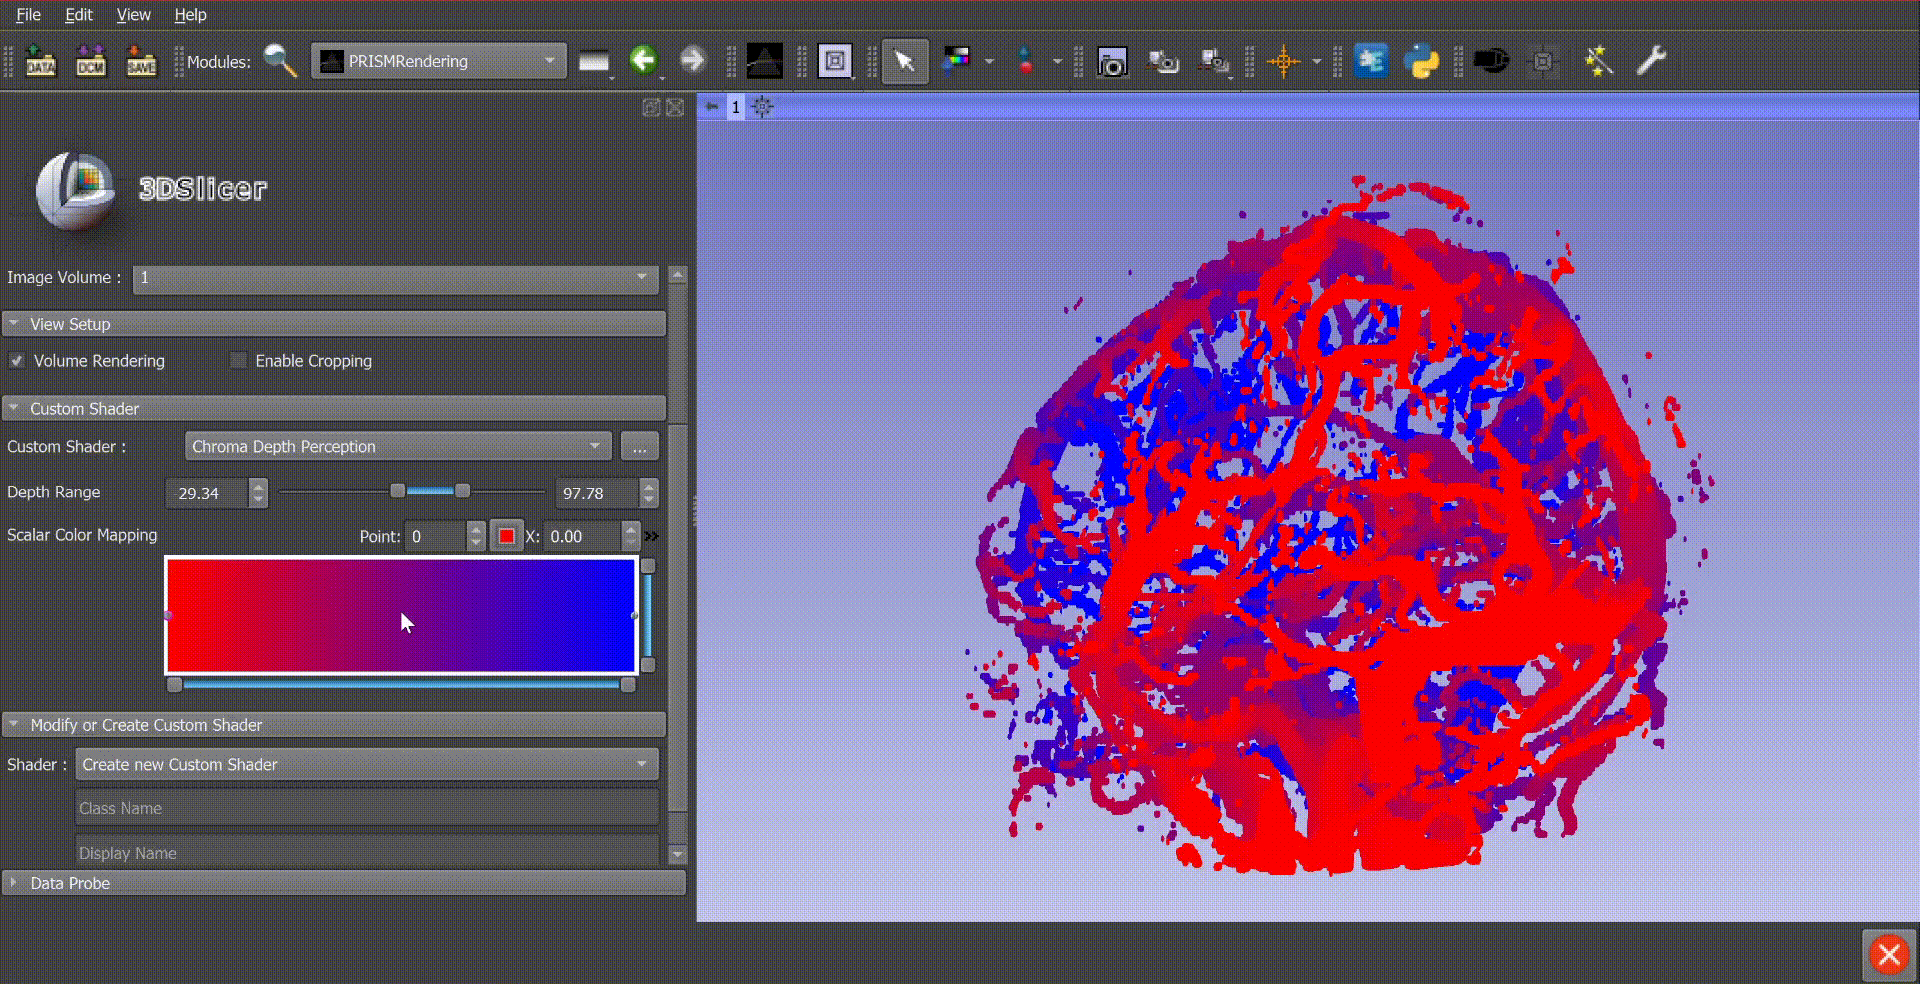
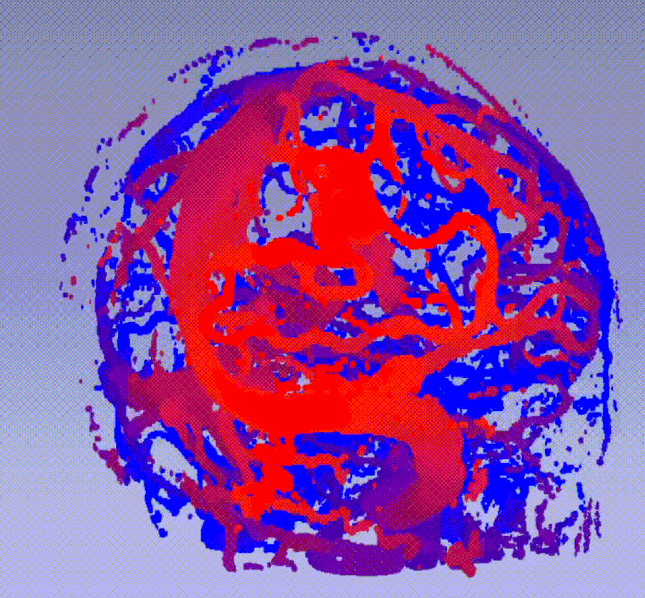
Chroma Depth Perception
This technique brings out the depth of a volume with a smooth transition between all hues.
You can download the sample volume by clicking here.
It is possible to :
Adjust the range of the volume.
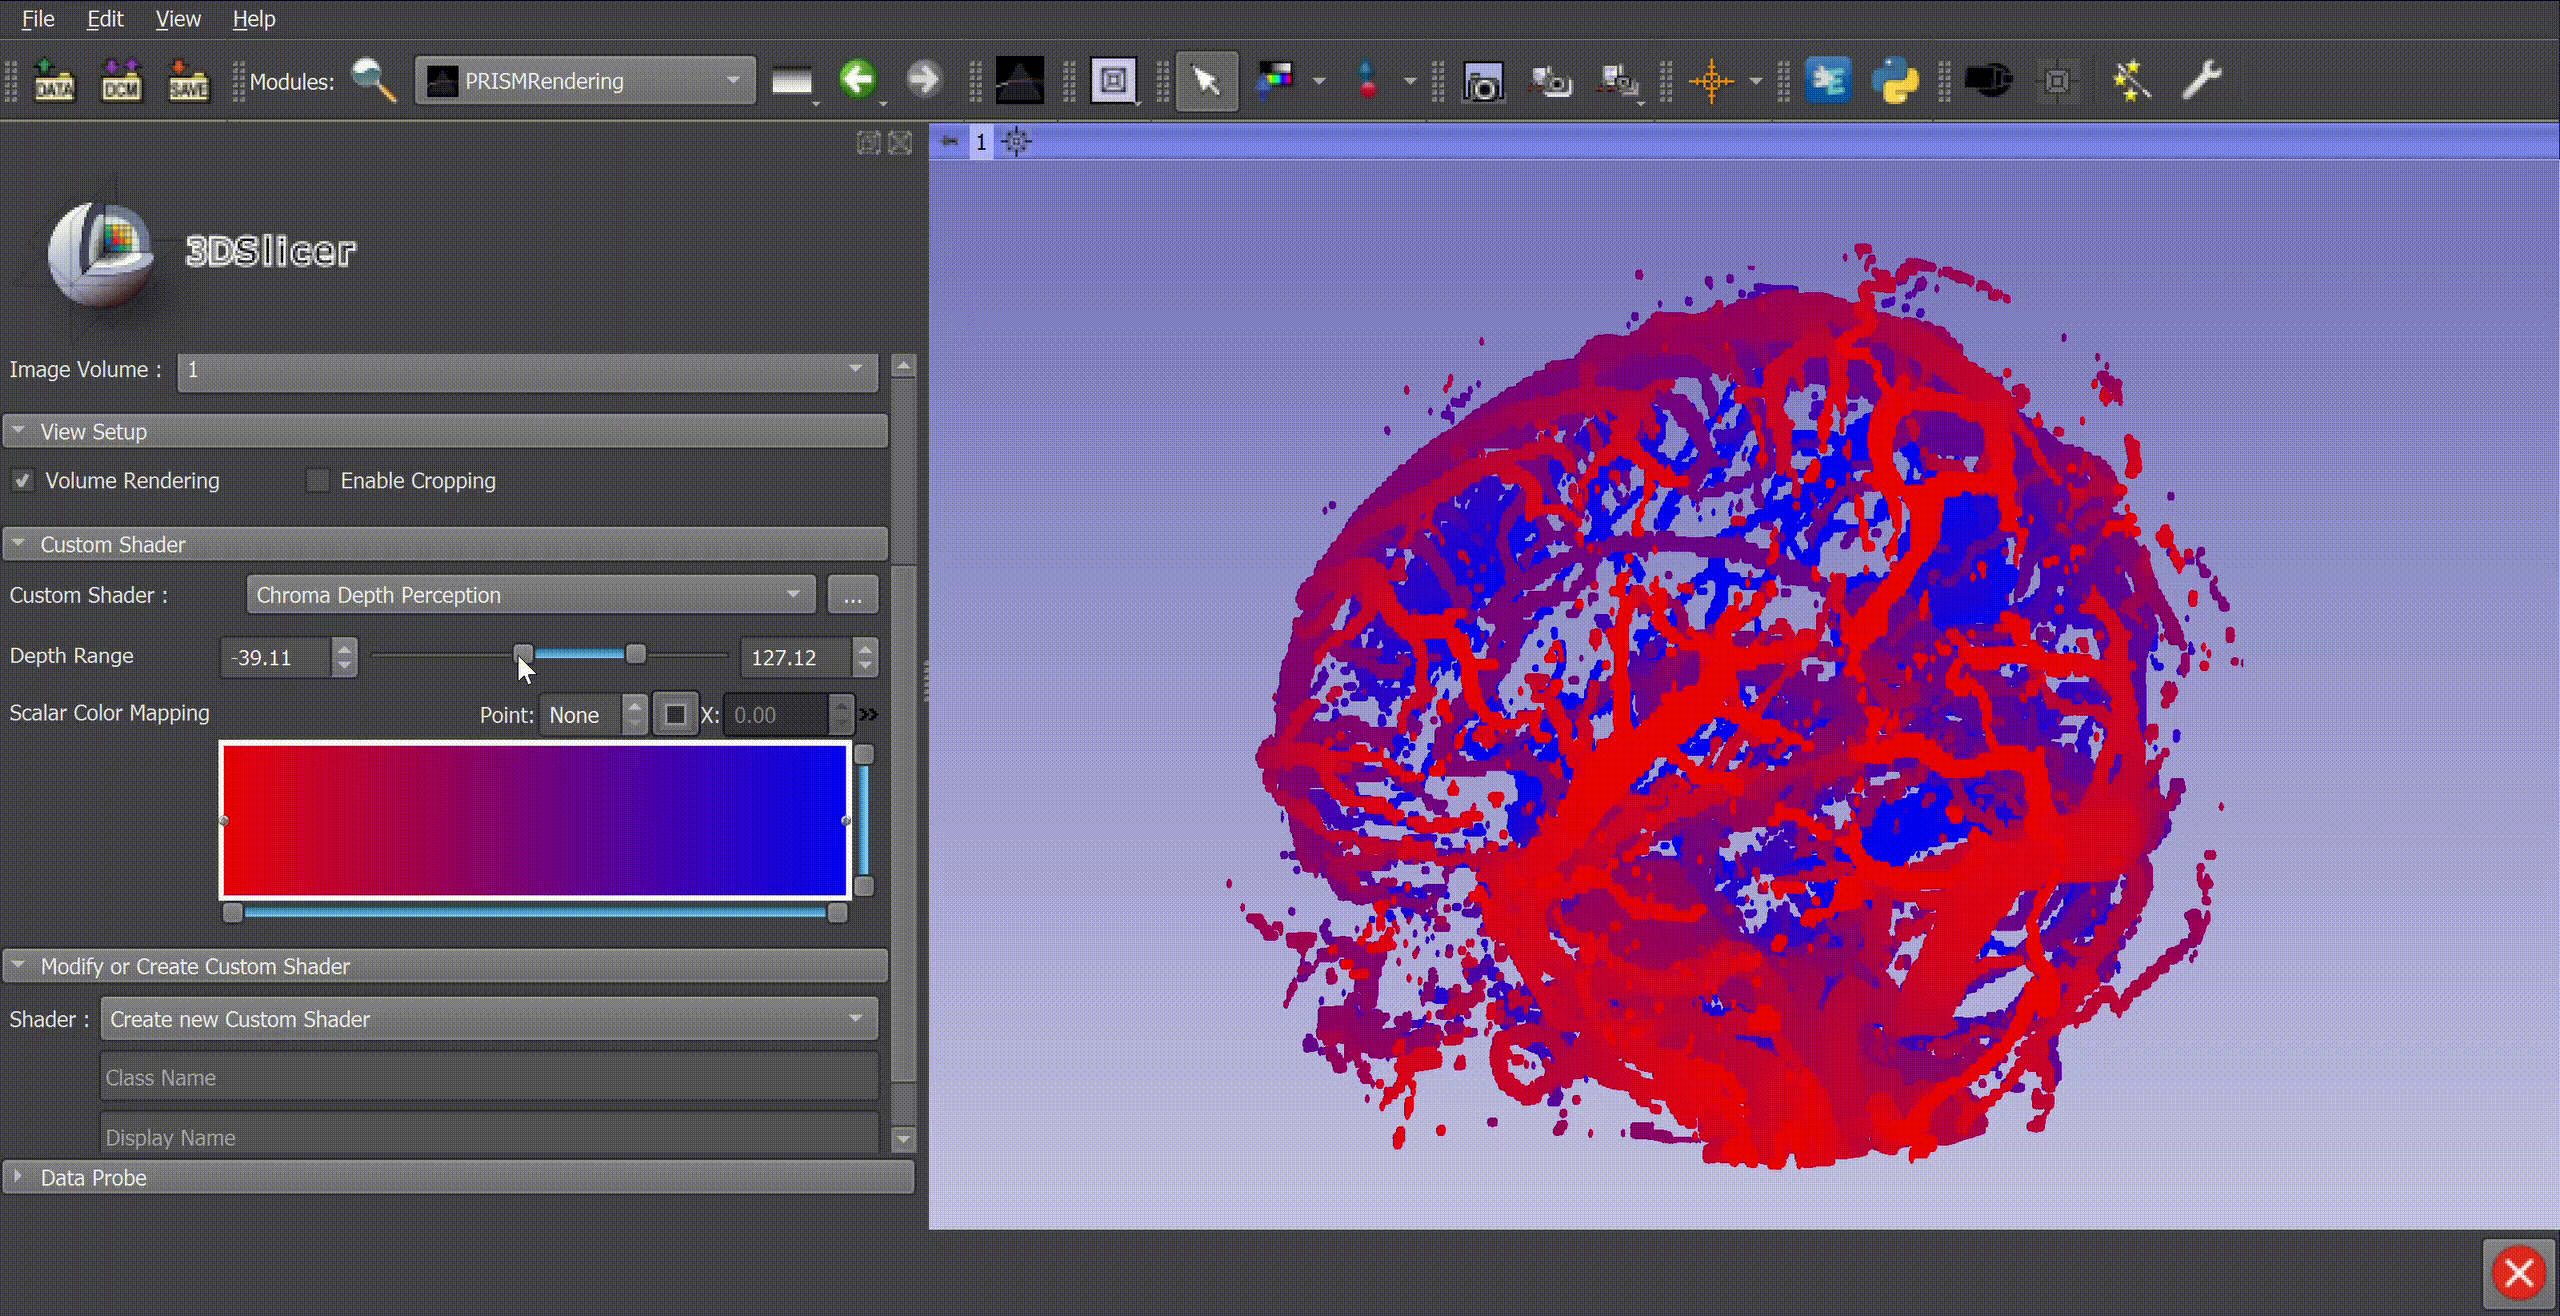
Adjust the transfer function’s points.
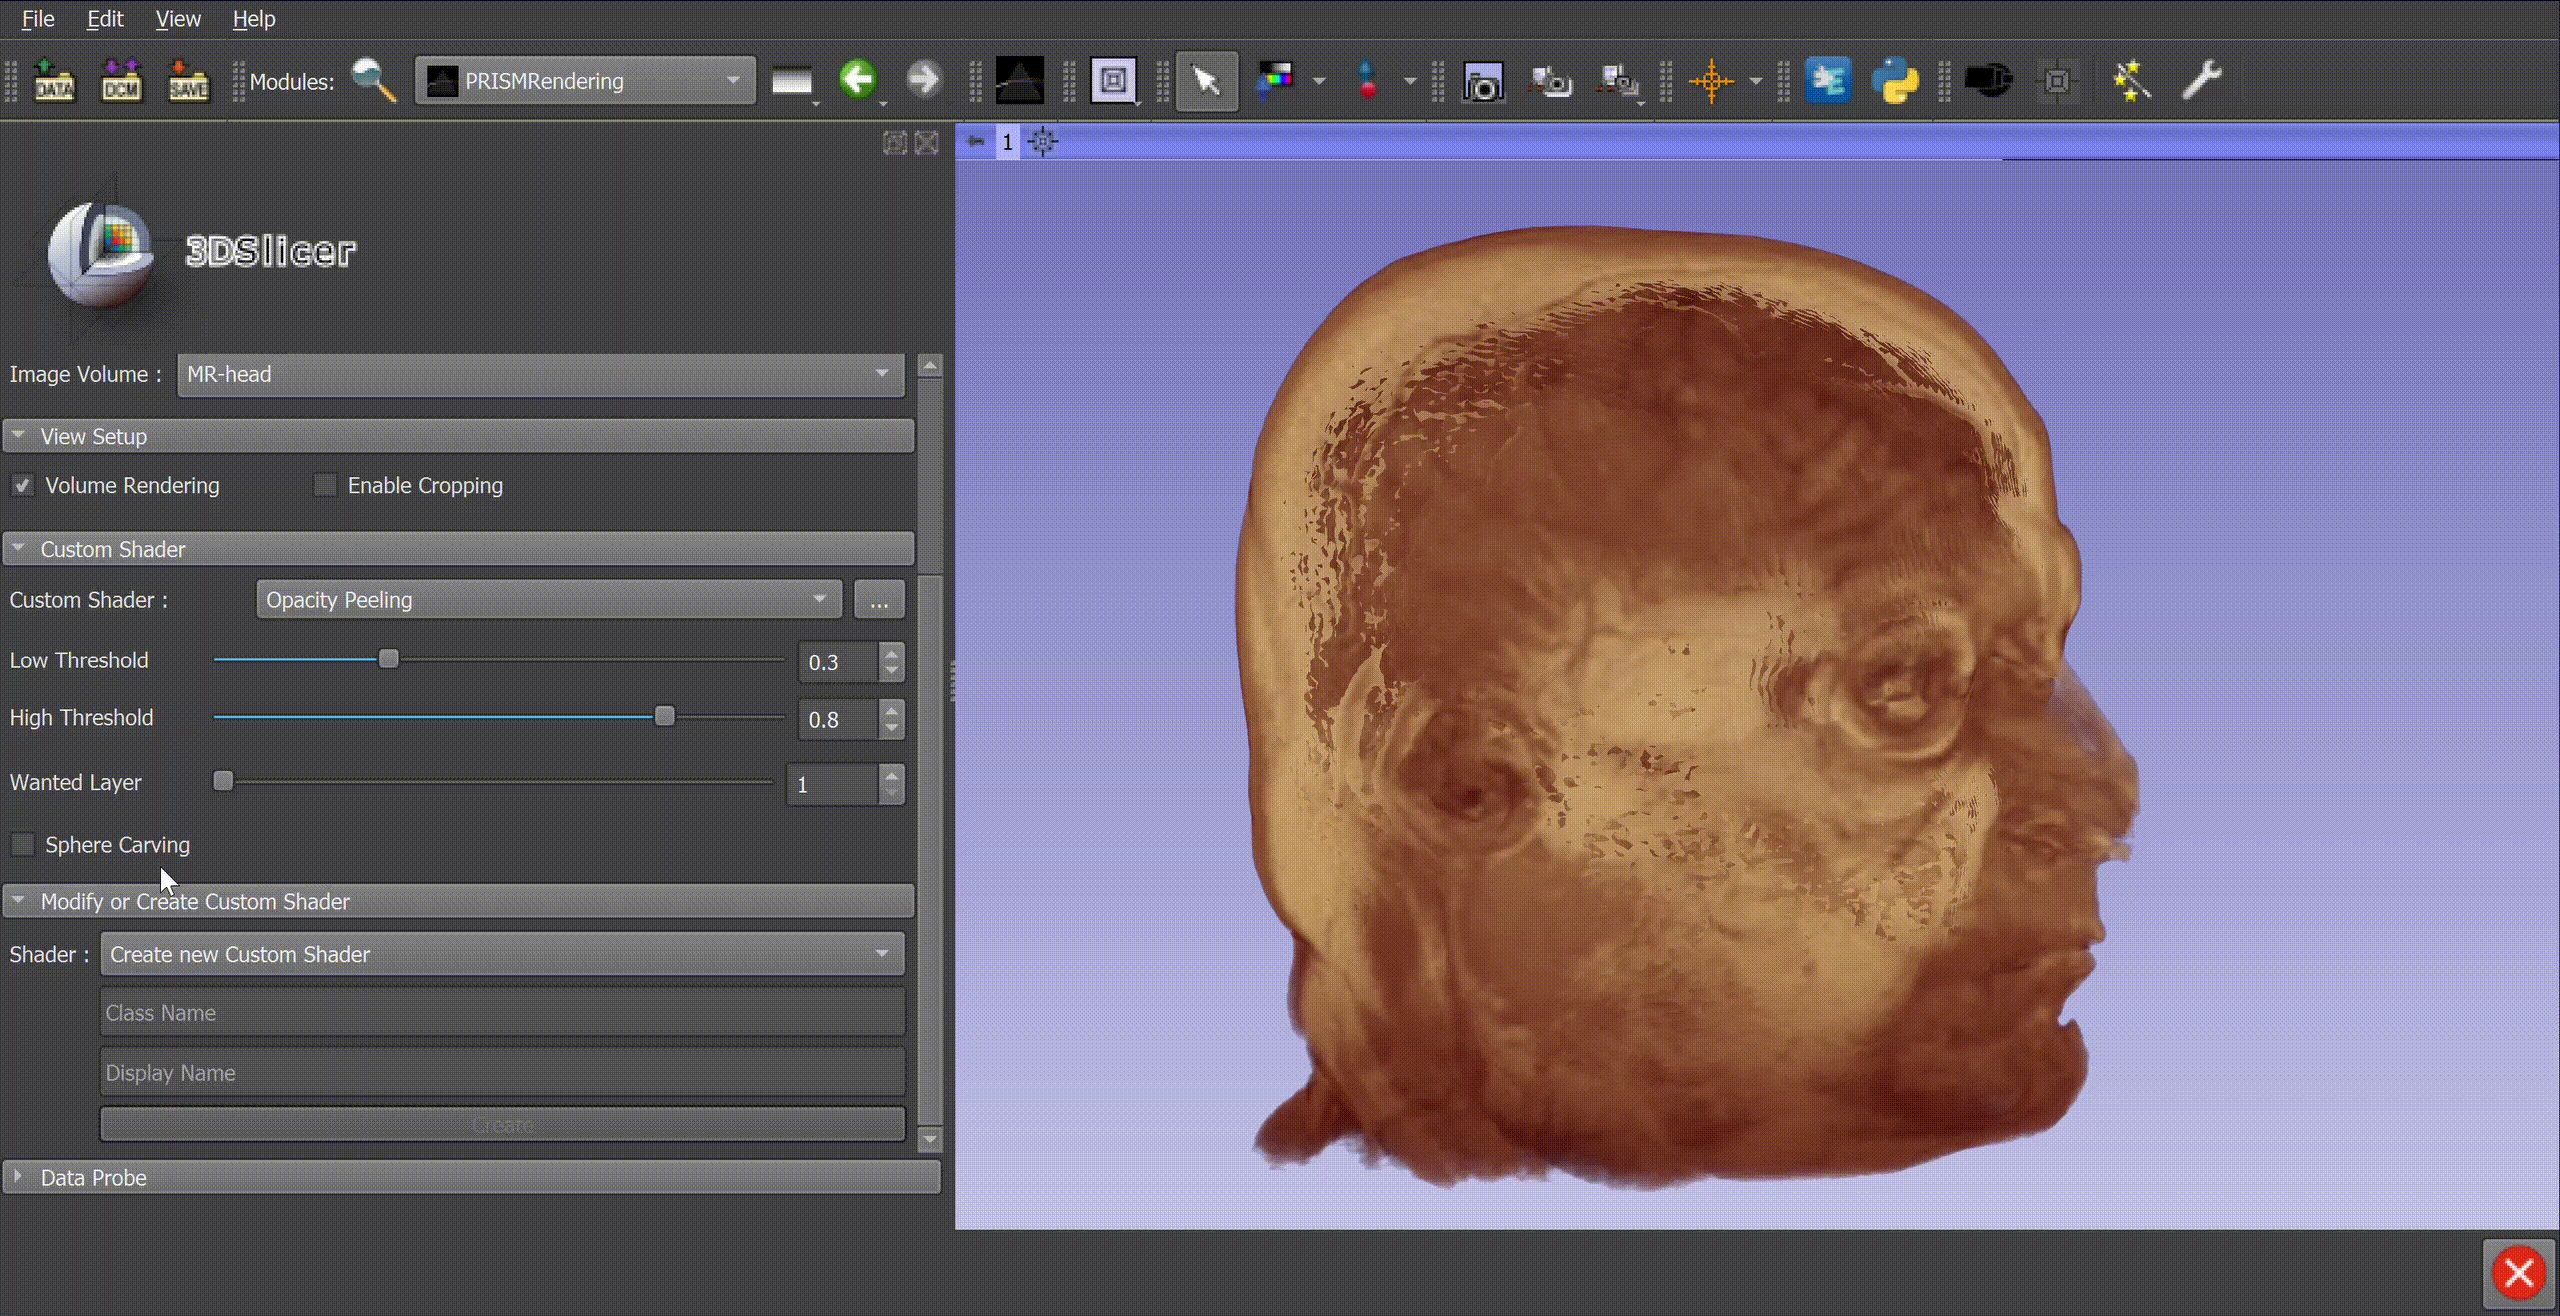
Opacity Peeling
This technique respond to the problem of occlusion of certain structures in the volume. It consists in removing the first n layers of tissue during the integration of the ray.
You can download the sample volume by clicking here.
It is possible to :
Adjust the lower value of the threshold.
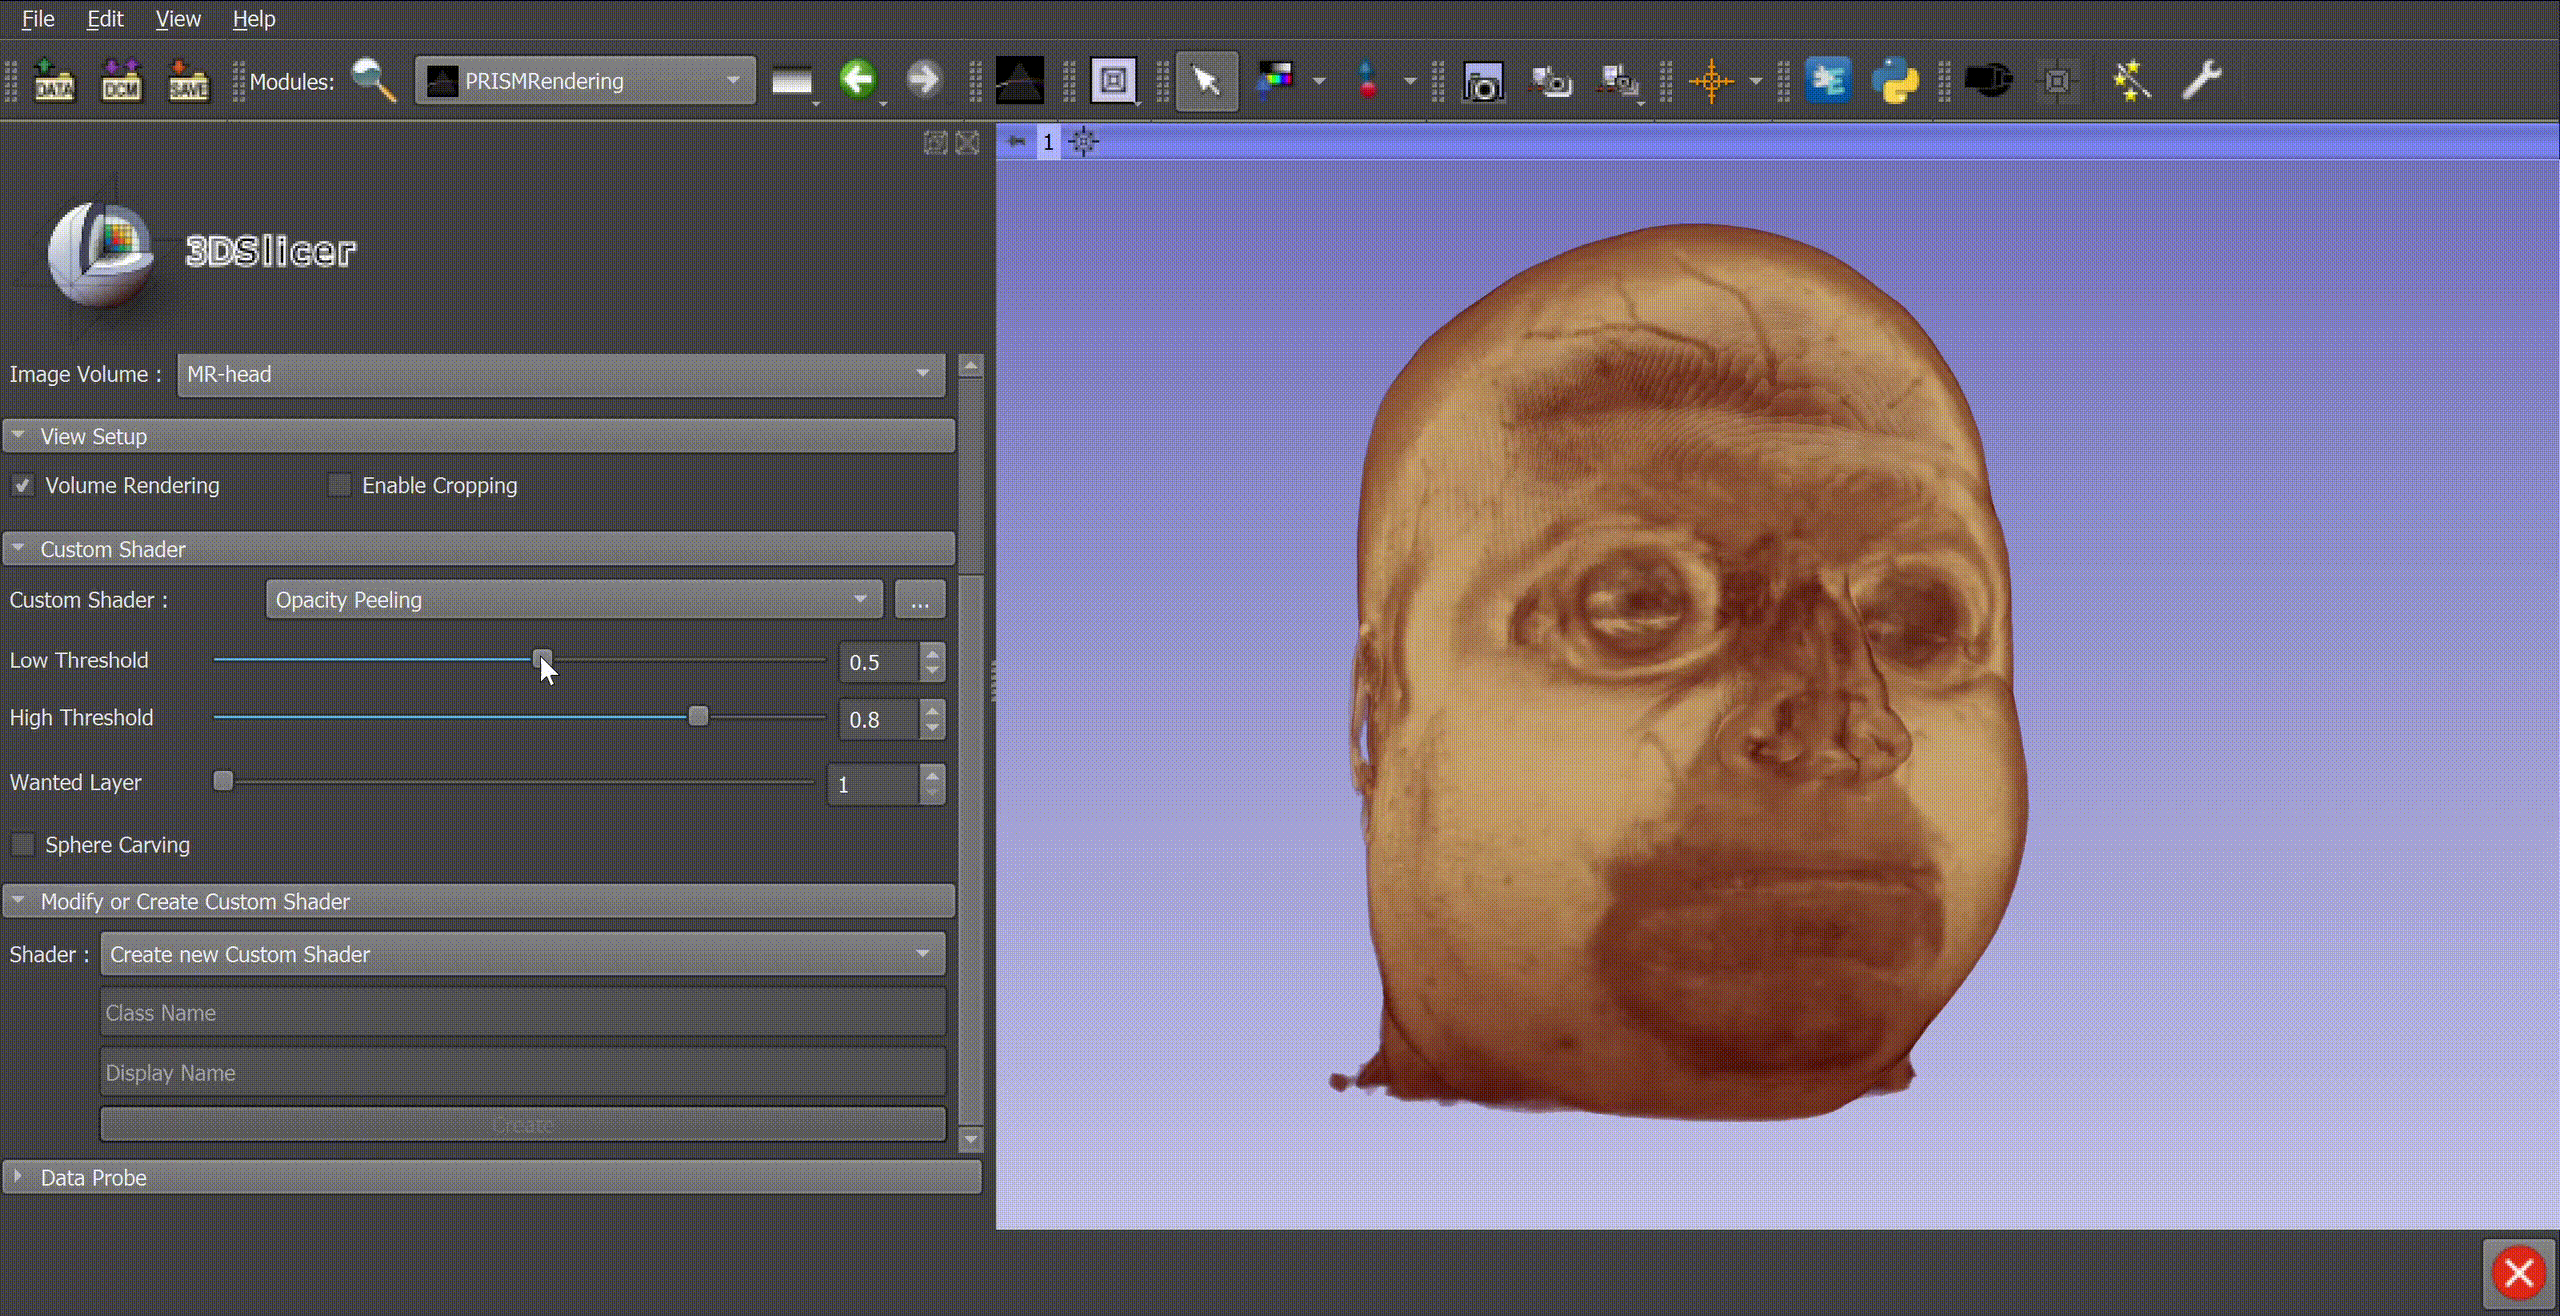
Adjust the upper value of the threshold.
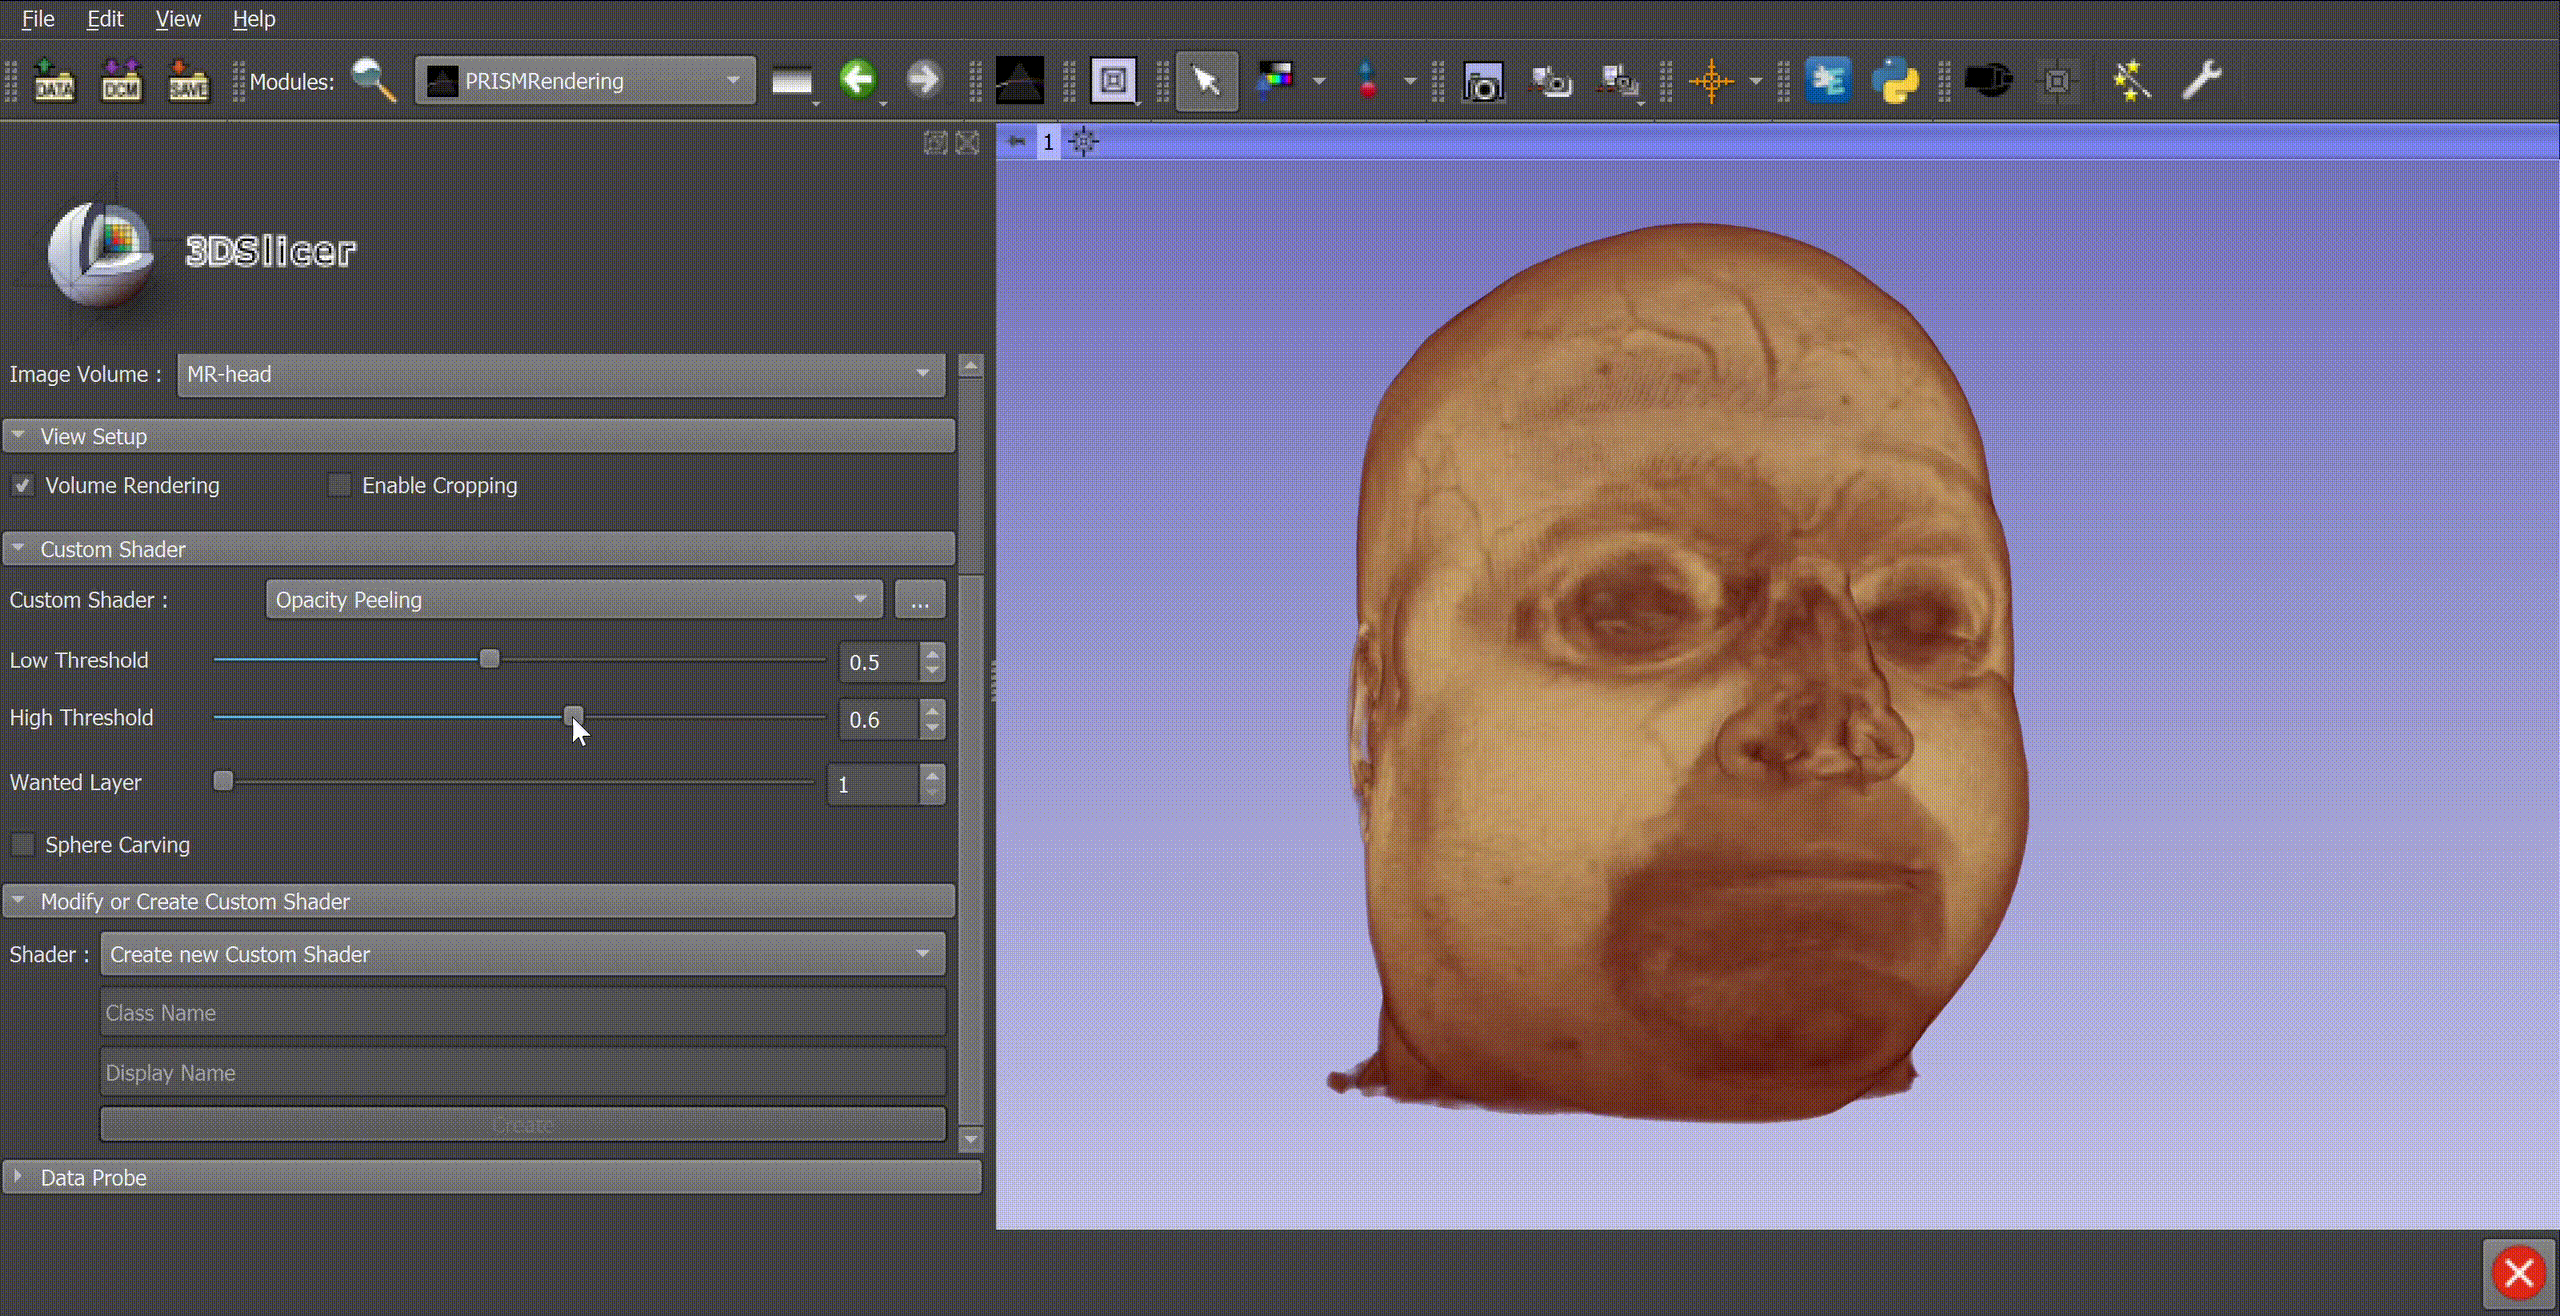
Adjust the wanted layer.

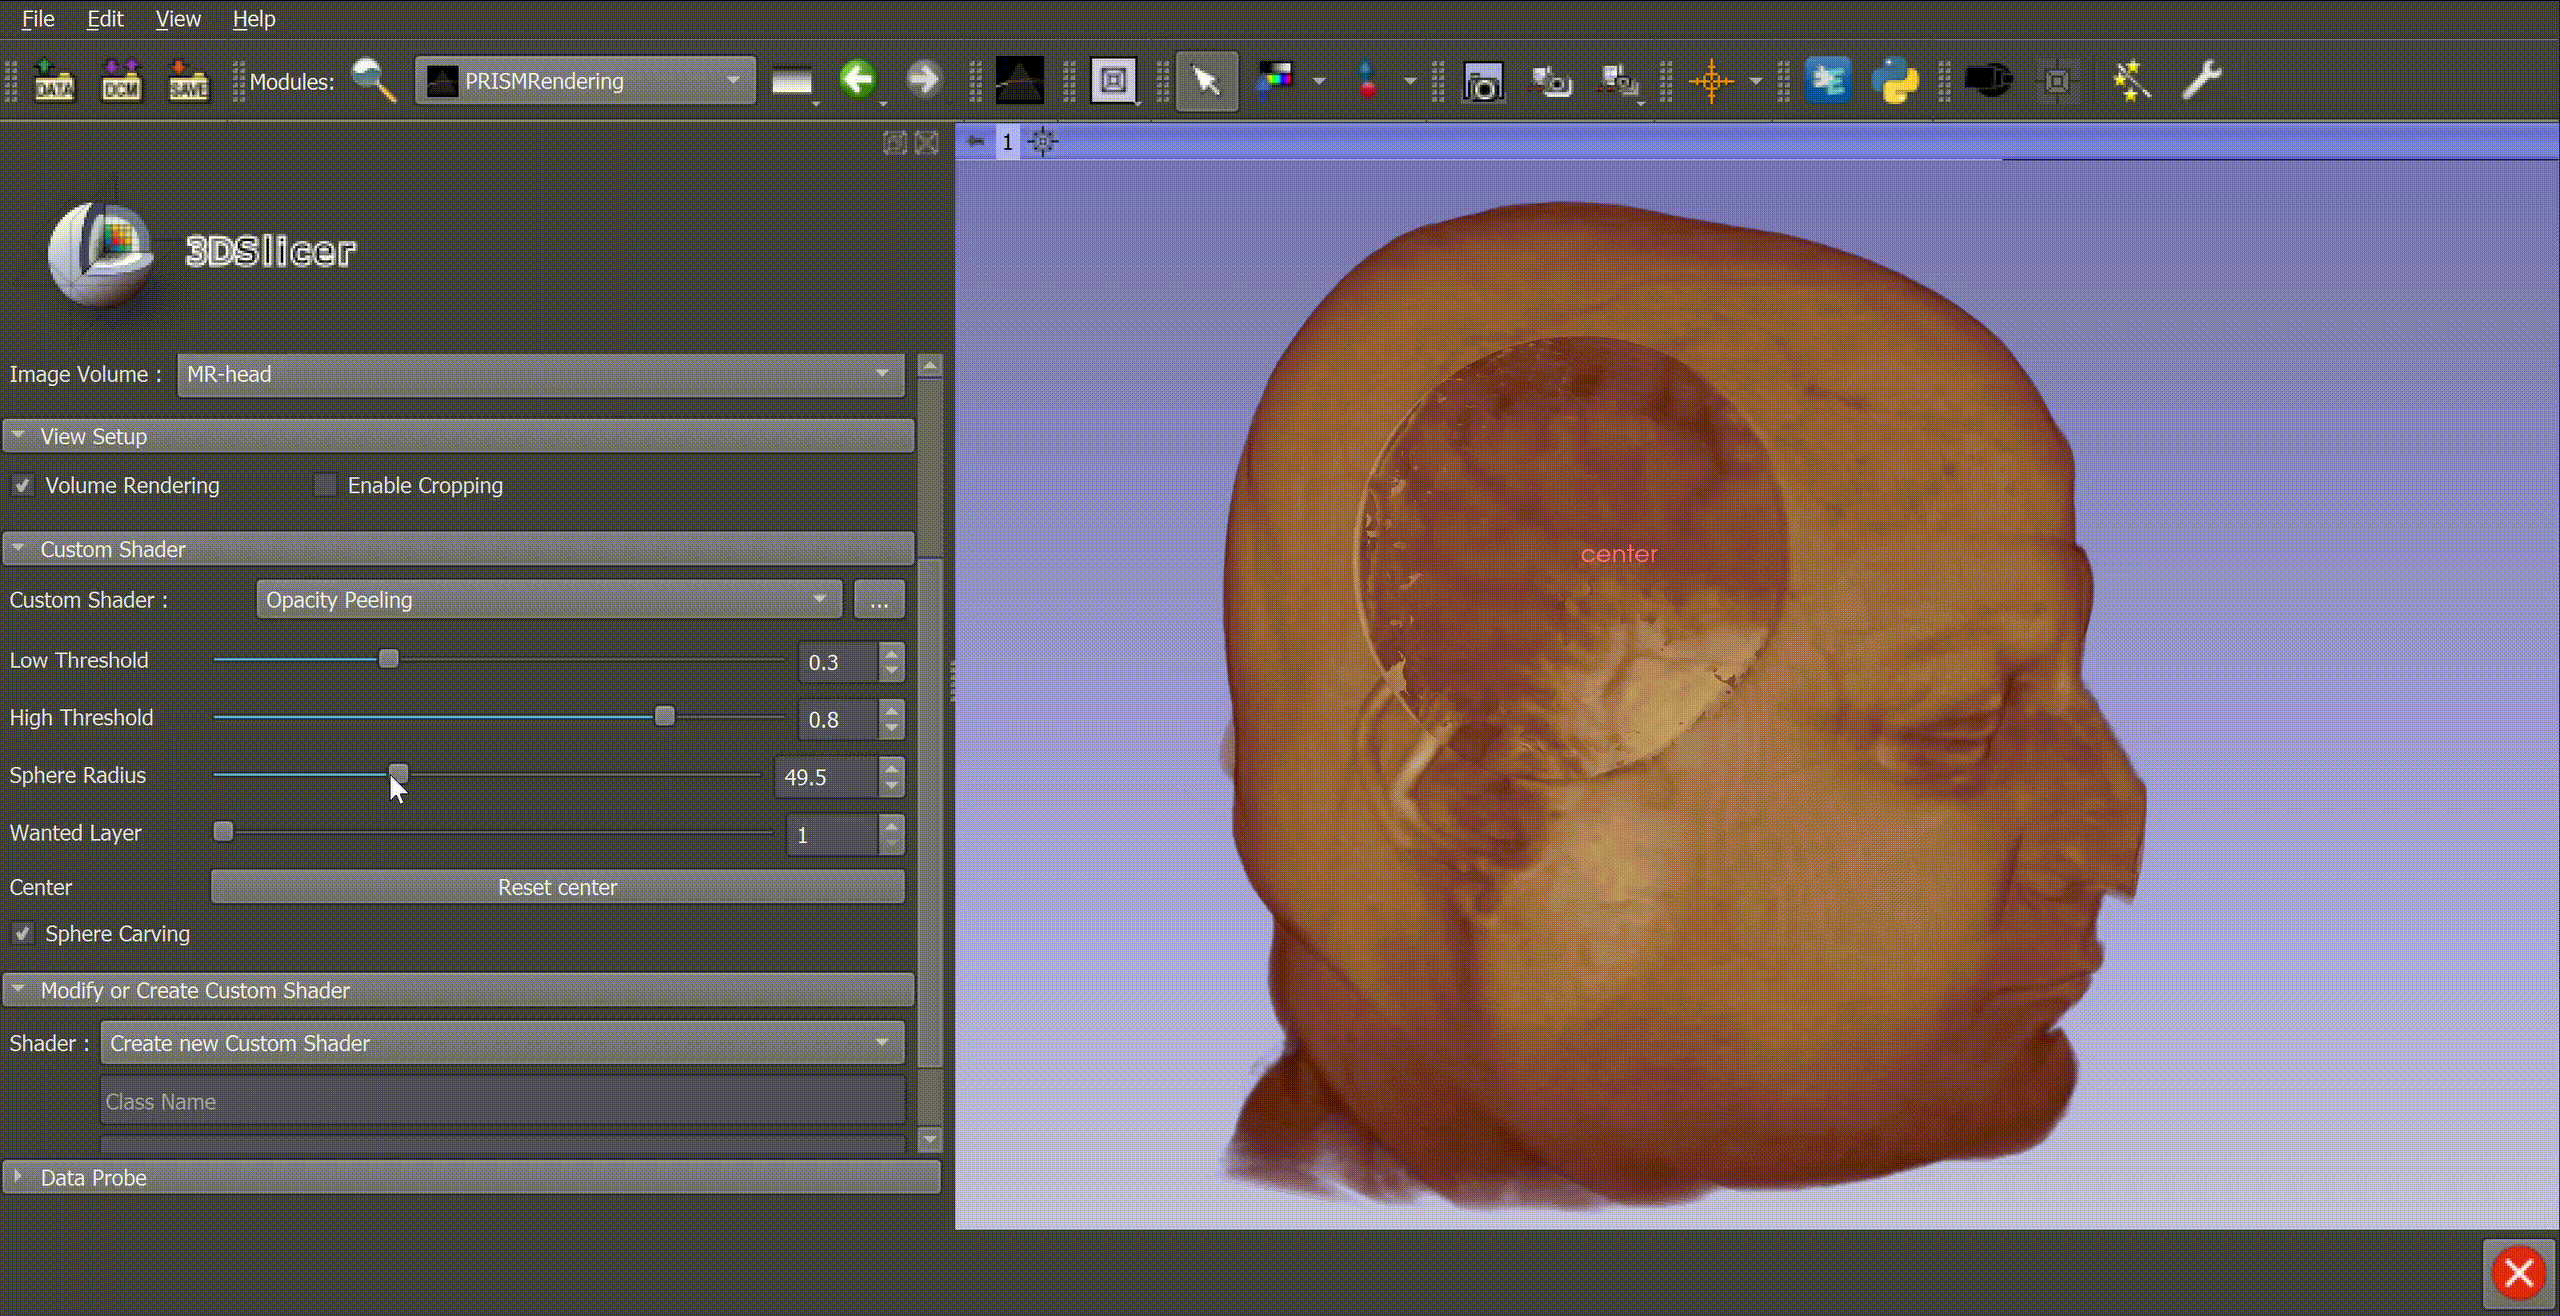
Enable/disable the use of a sphere to peel the volume and specify the center of the sphere.
Modify the radius of the sphere.
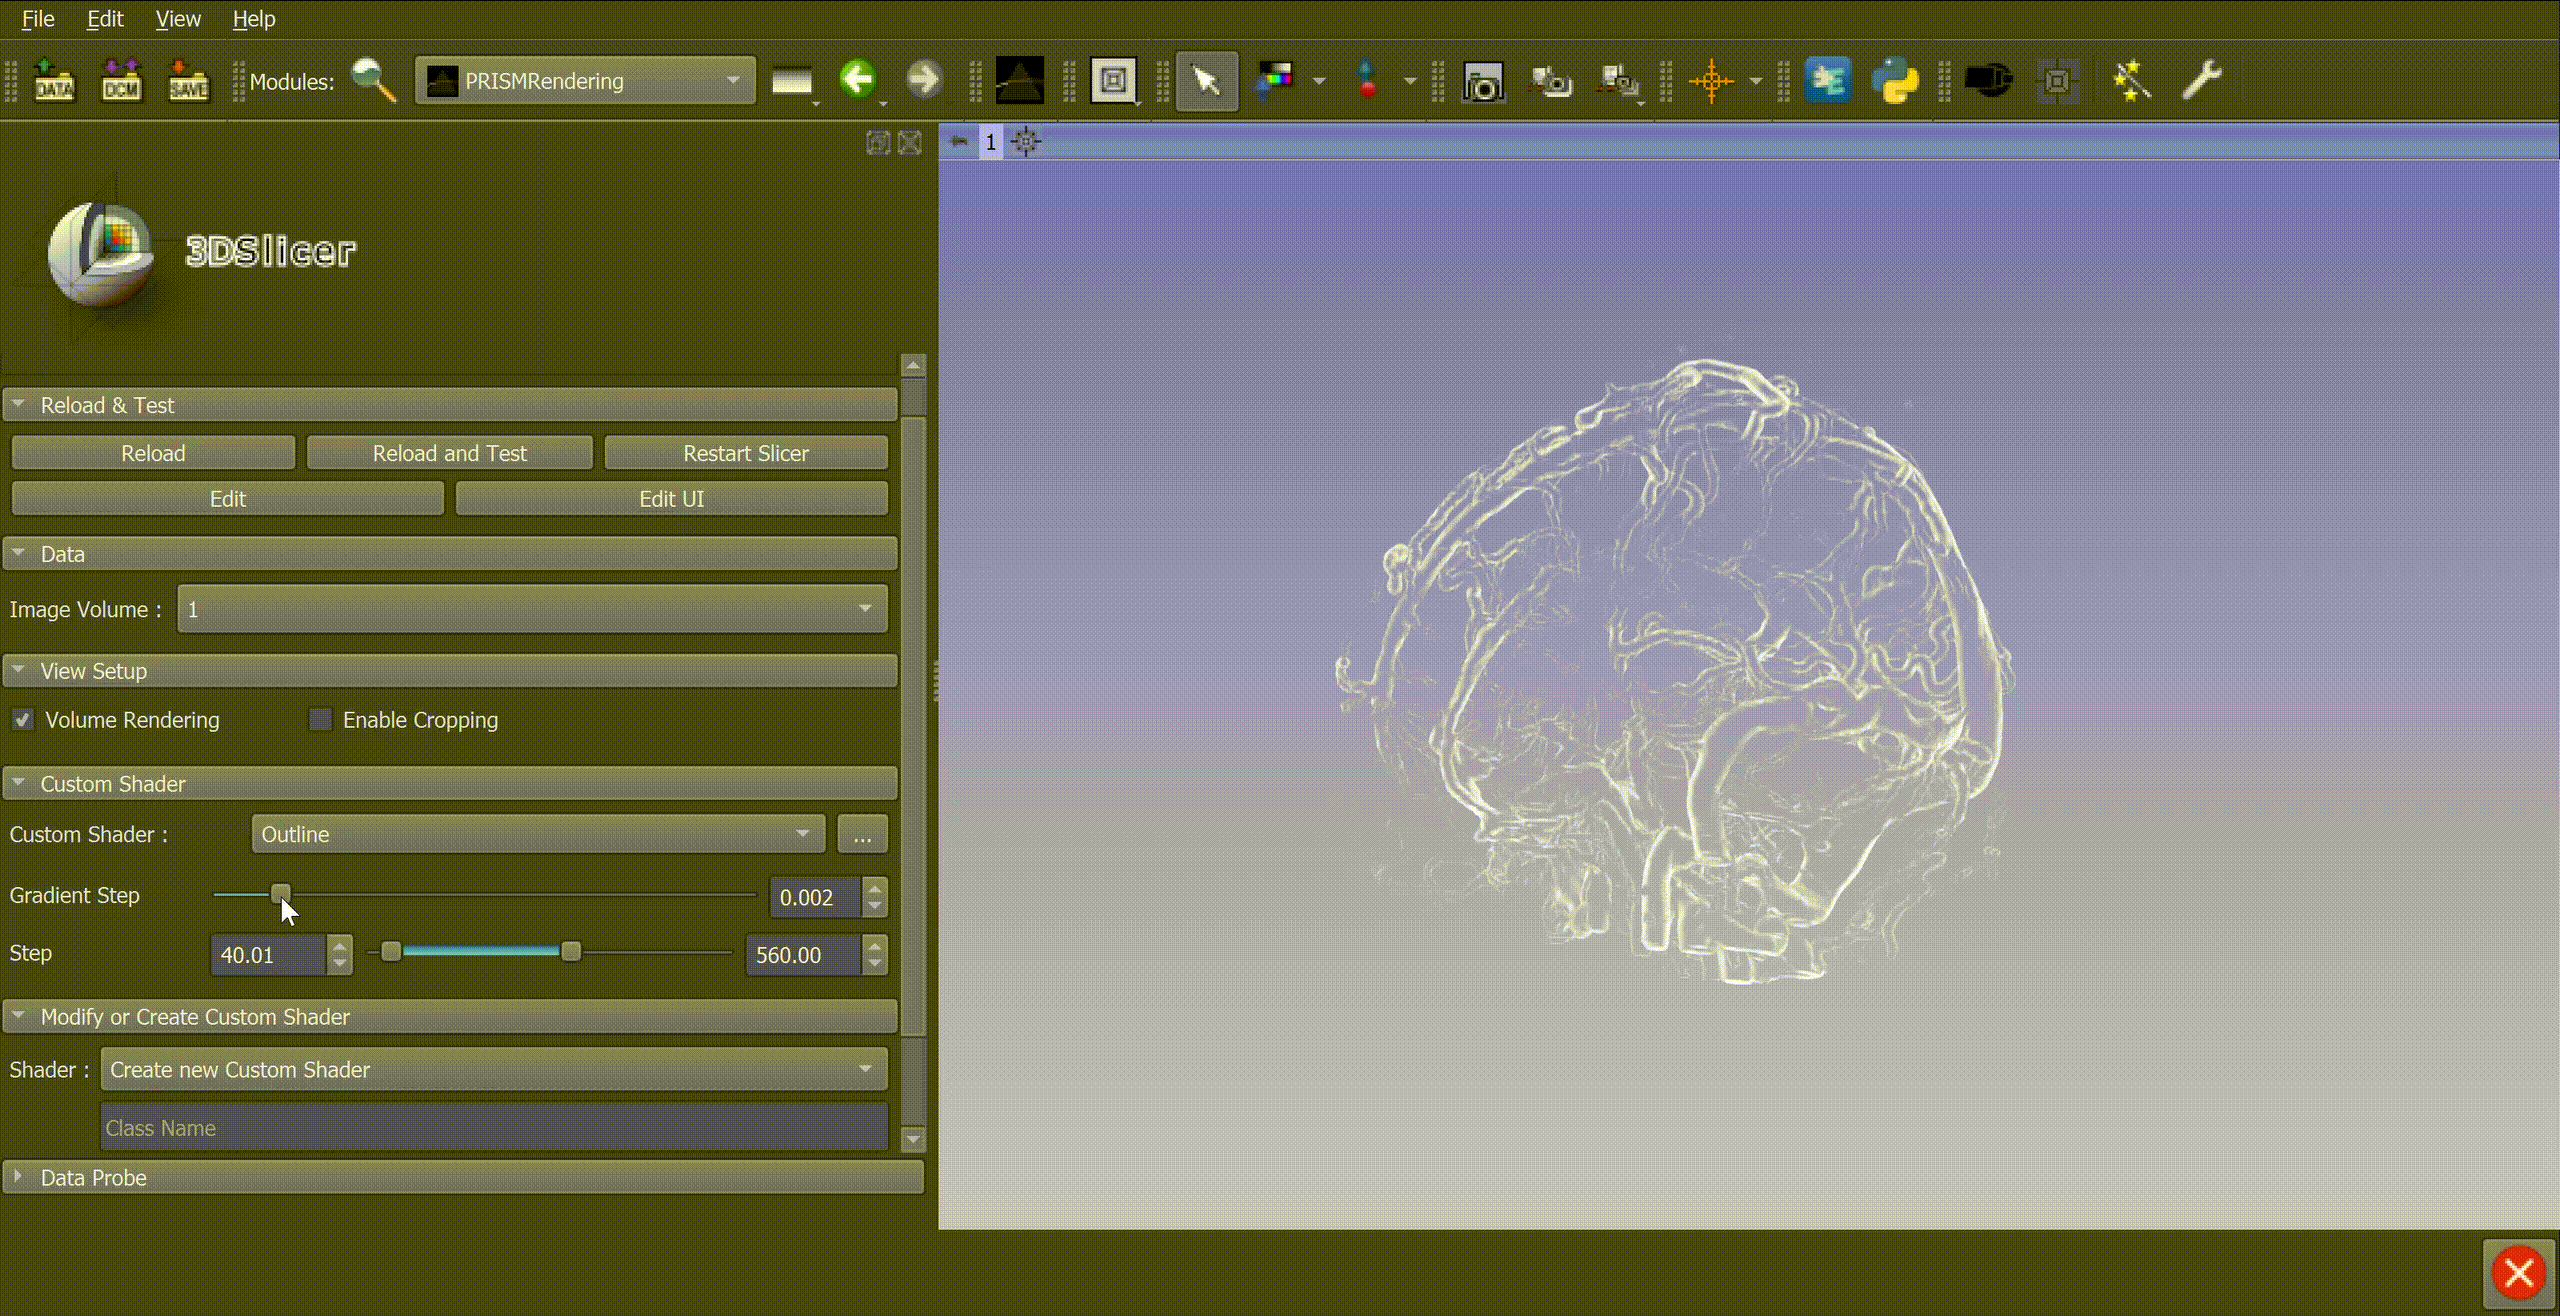
Outline
This shader highlights the borders of the volume and is particularly useful for visualizing complex structures such as the blood vessels of the brain. Indeed, the accentuation of the edges of the vessels makes it possible to improve the perception of the depths by ordering the order of depth of overlapping vessels.
You can download the sample volume by clicking here.
It is possible to :
Adjust the step for the calculation of the gradient.
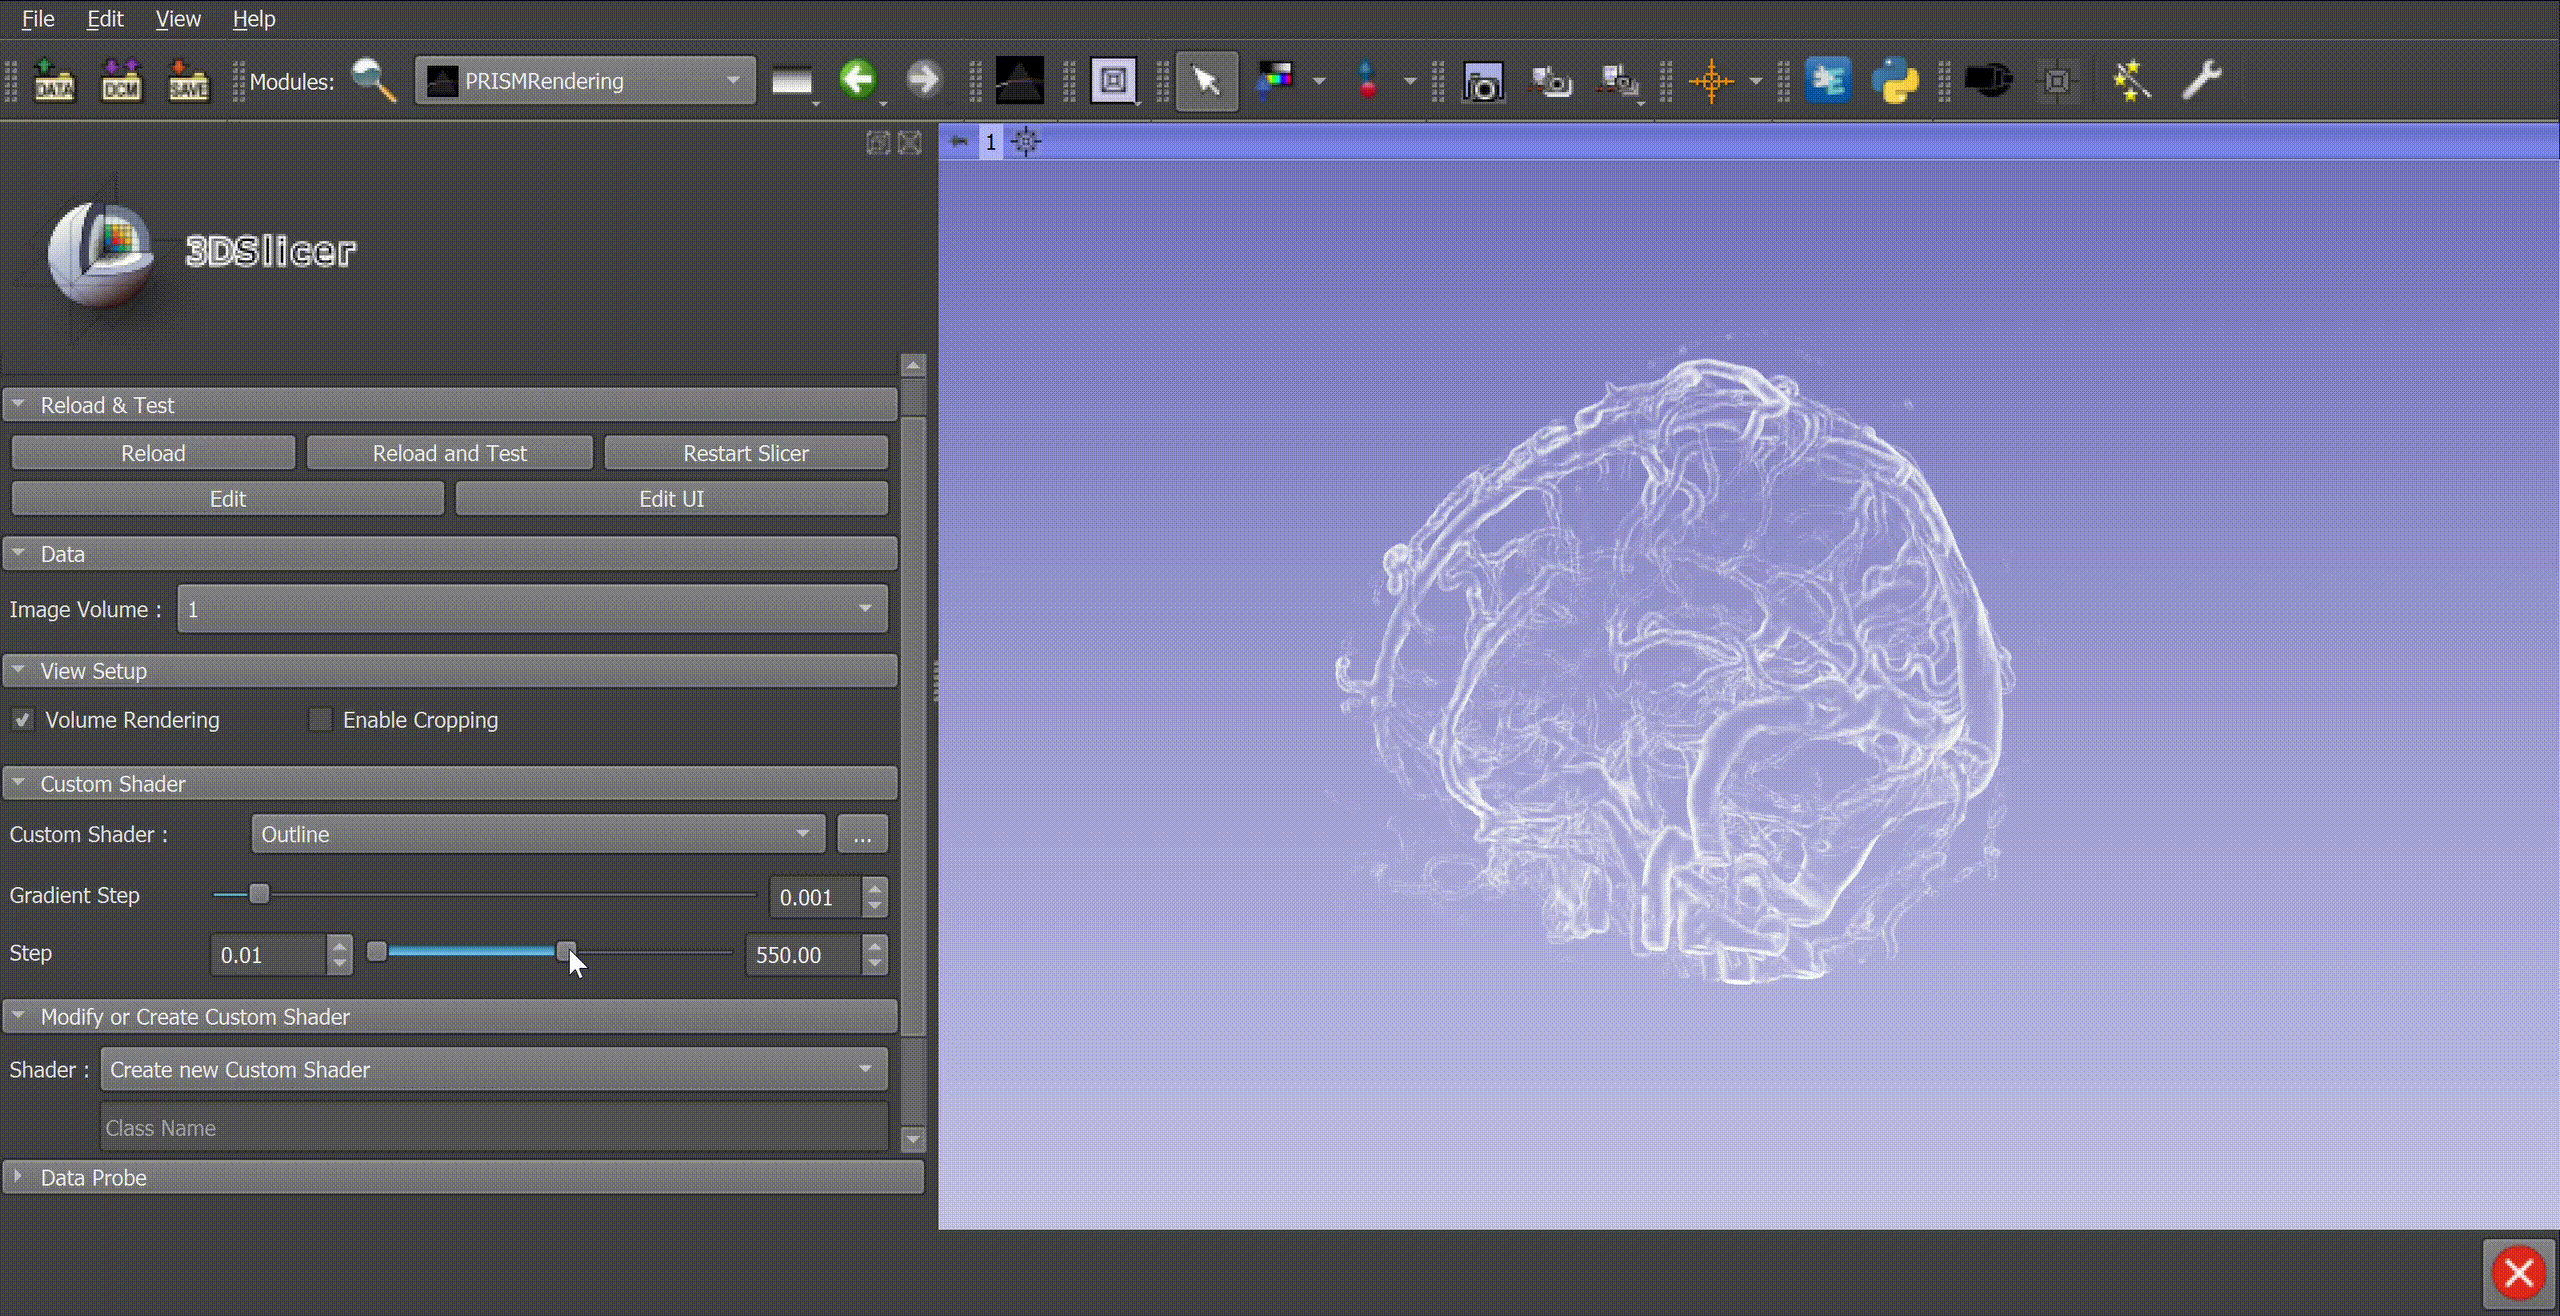
Adjust the parameters allowing to modify the gradients intensities captured by the function.
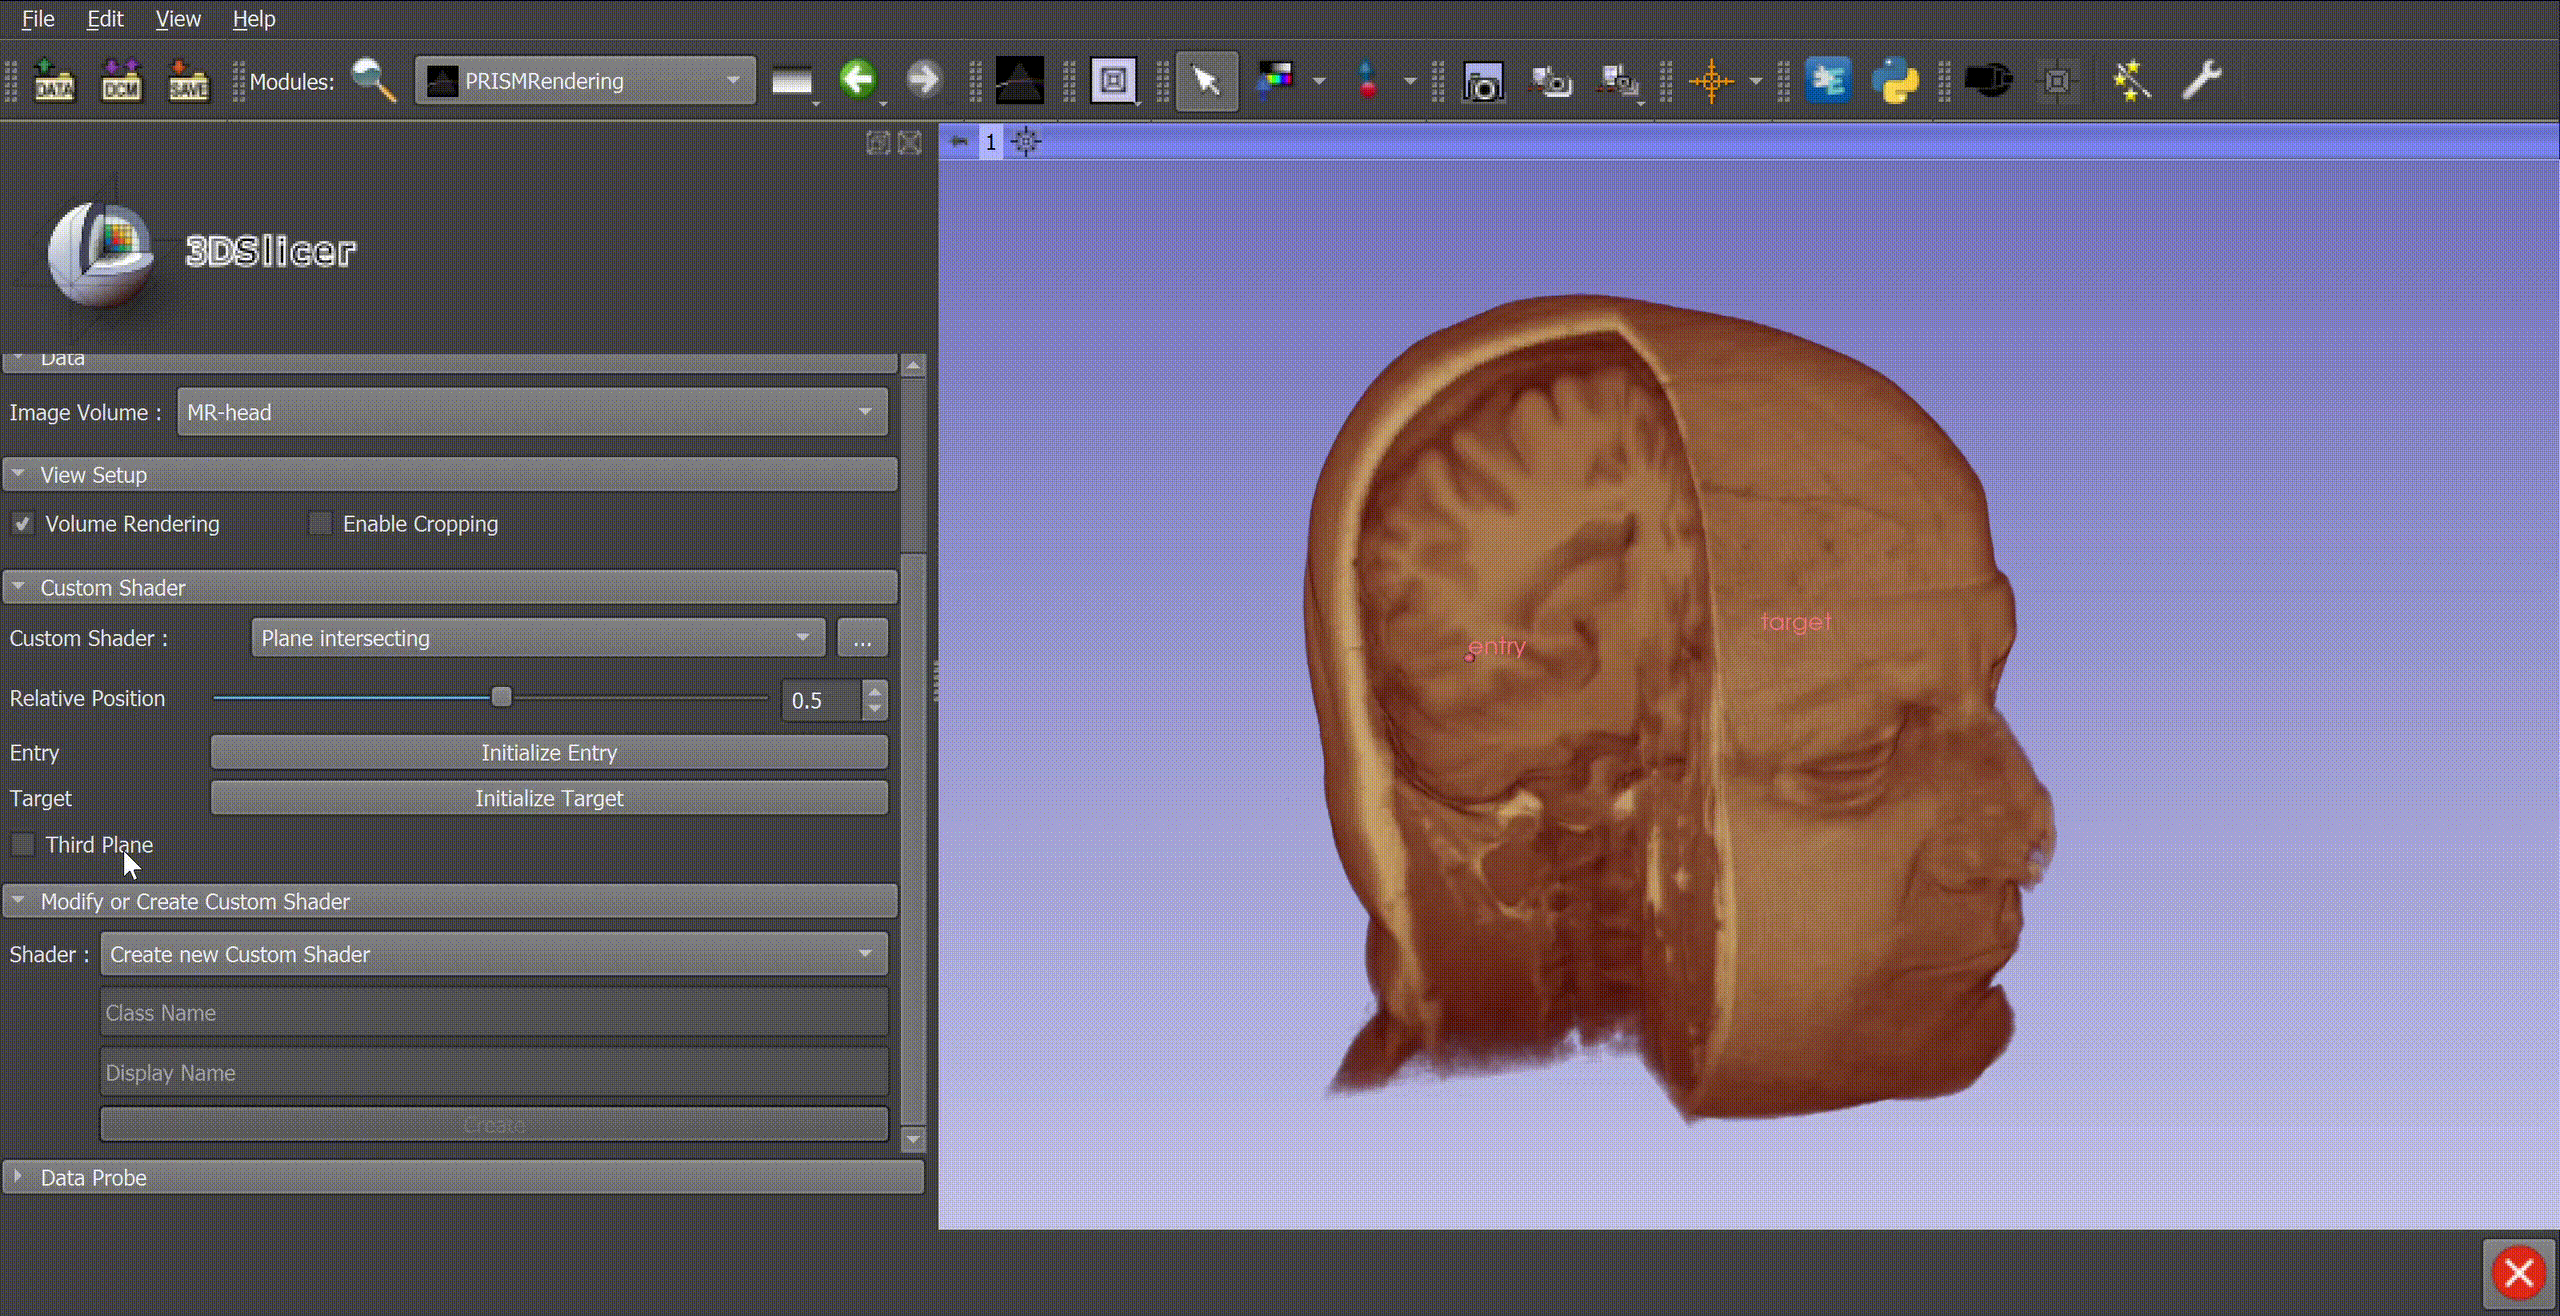
Plane Intersecting
This technique allows to visualize the anatomy along the approach plane for surgery.
You can download the sample volume by clicking here.
It is possible to :
Initialize the two points.

Adjust the relative position of the plane between the two points.
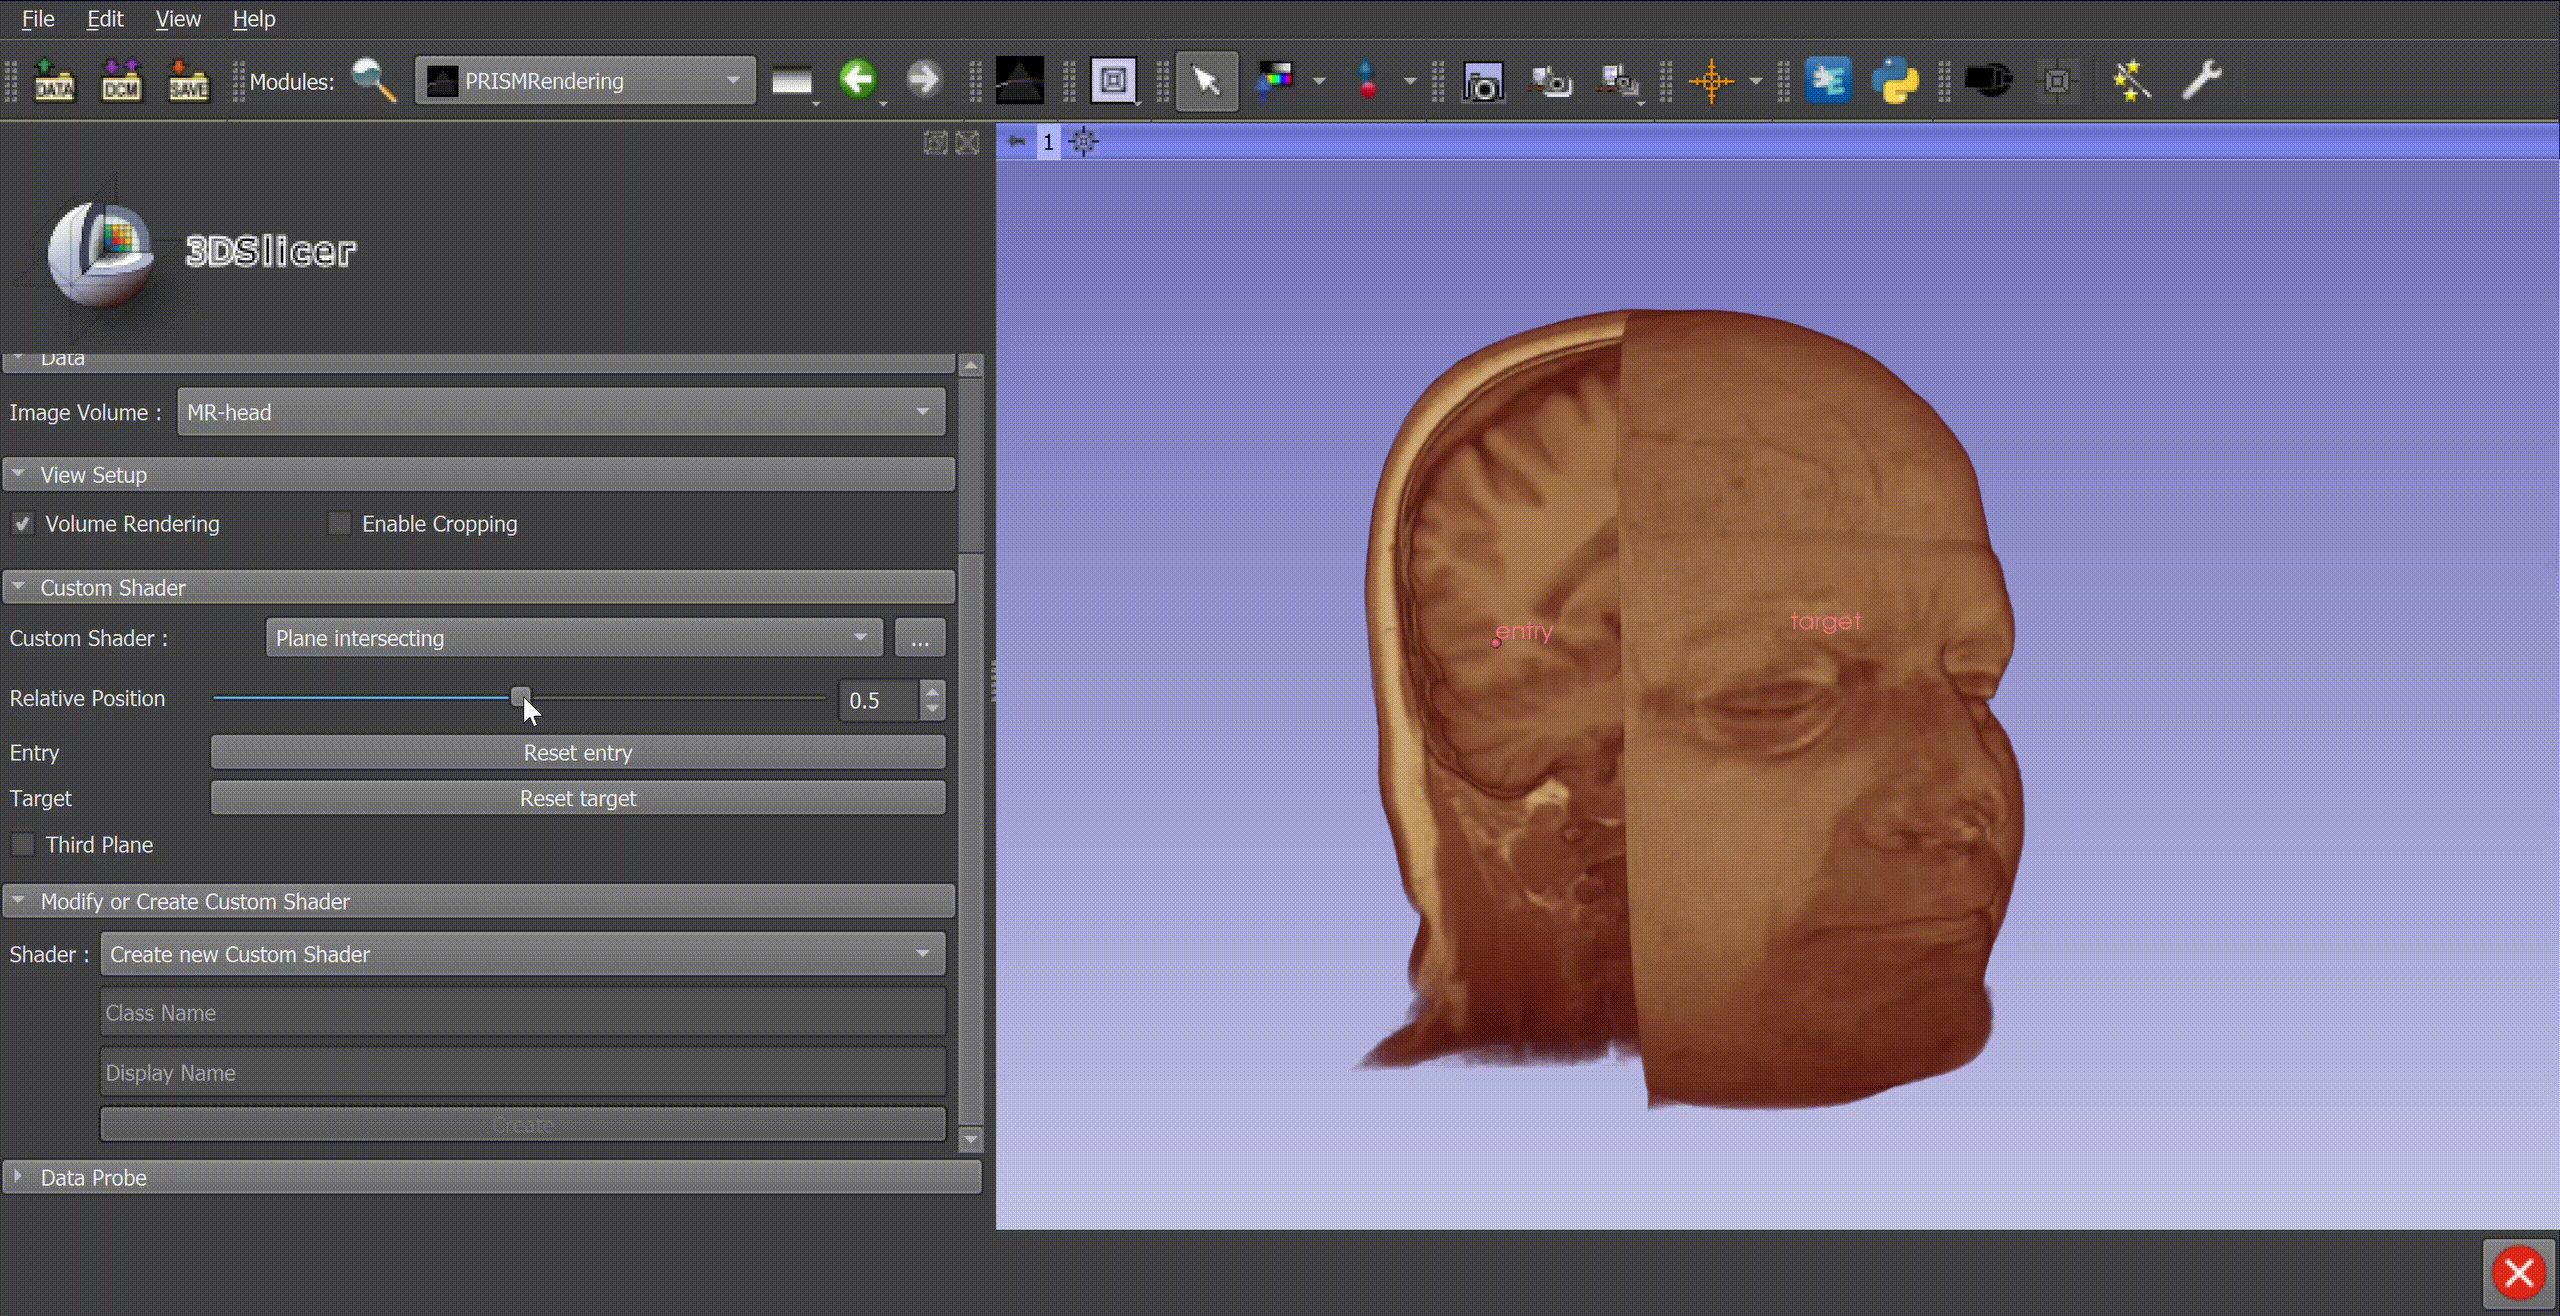
Modify the position of the two points.
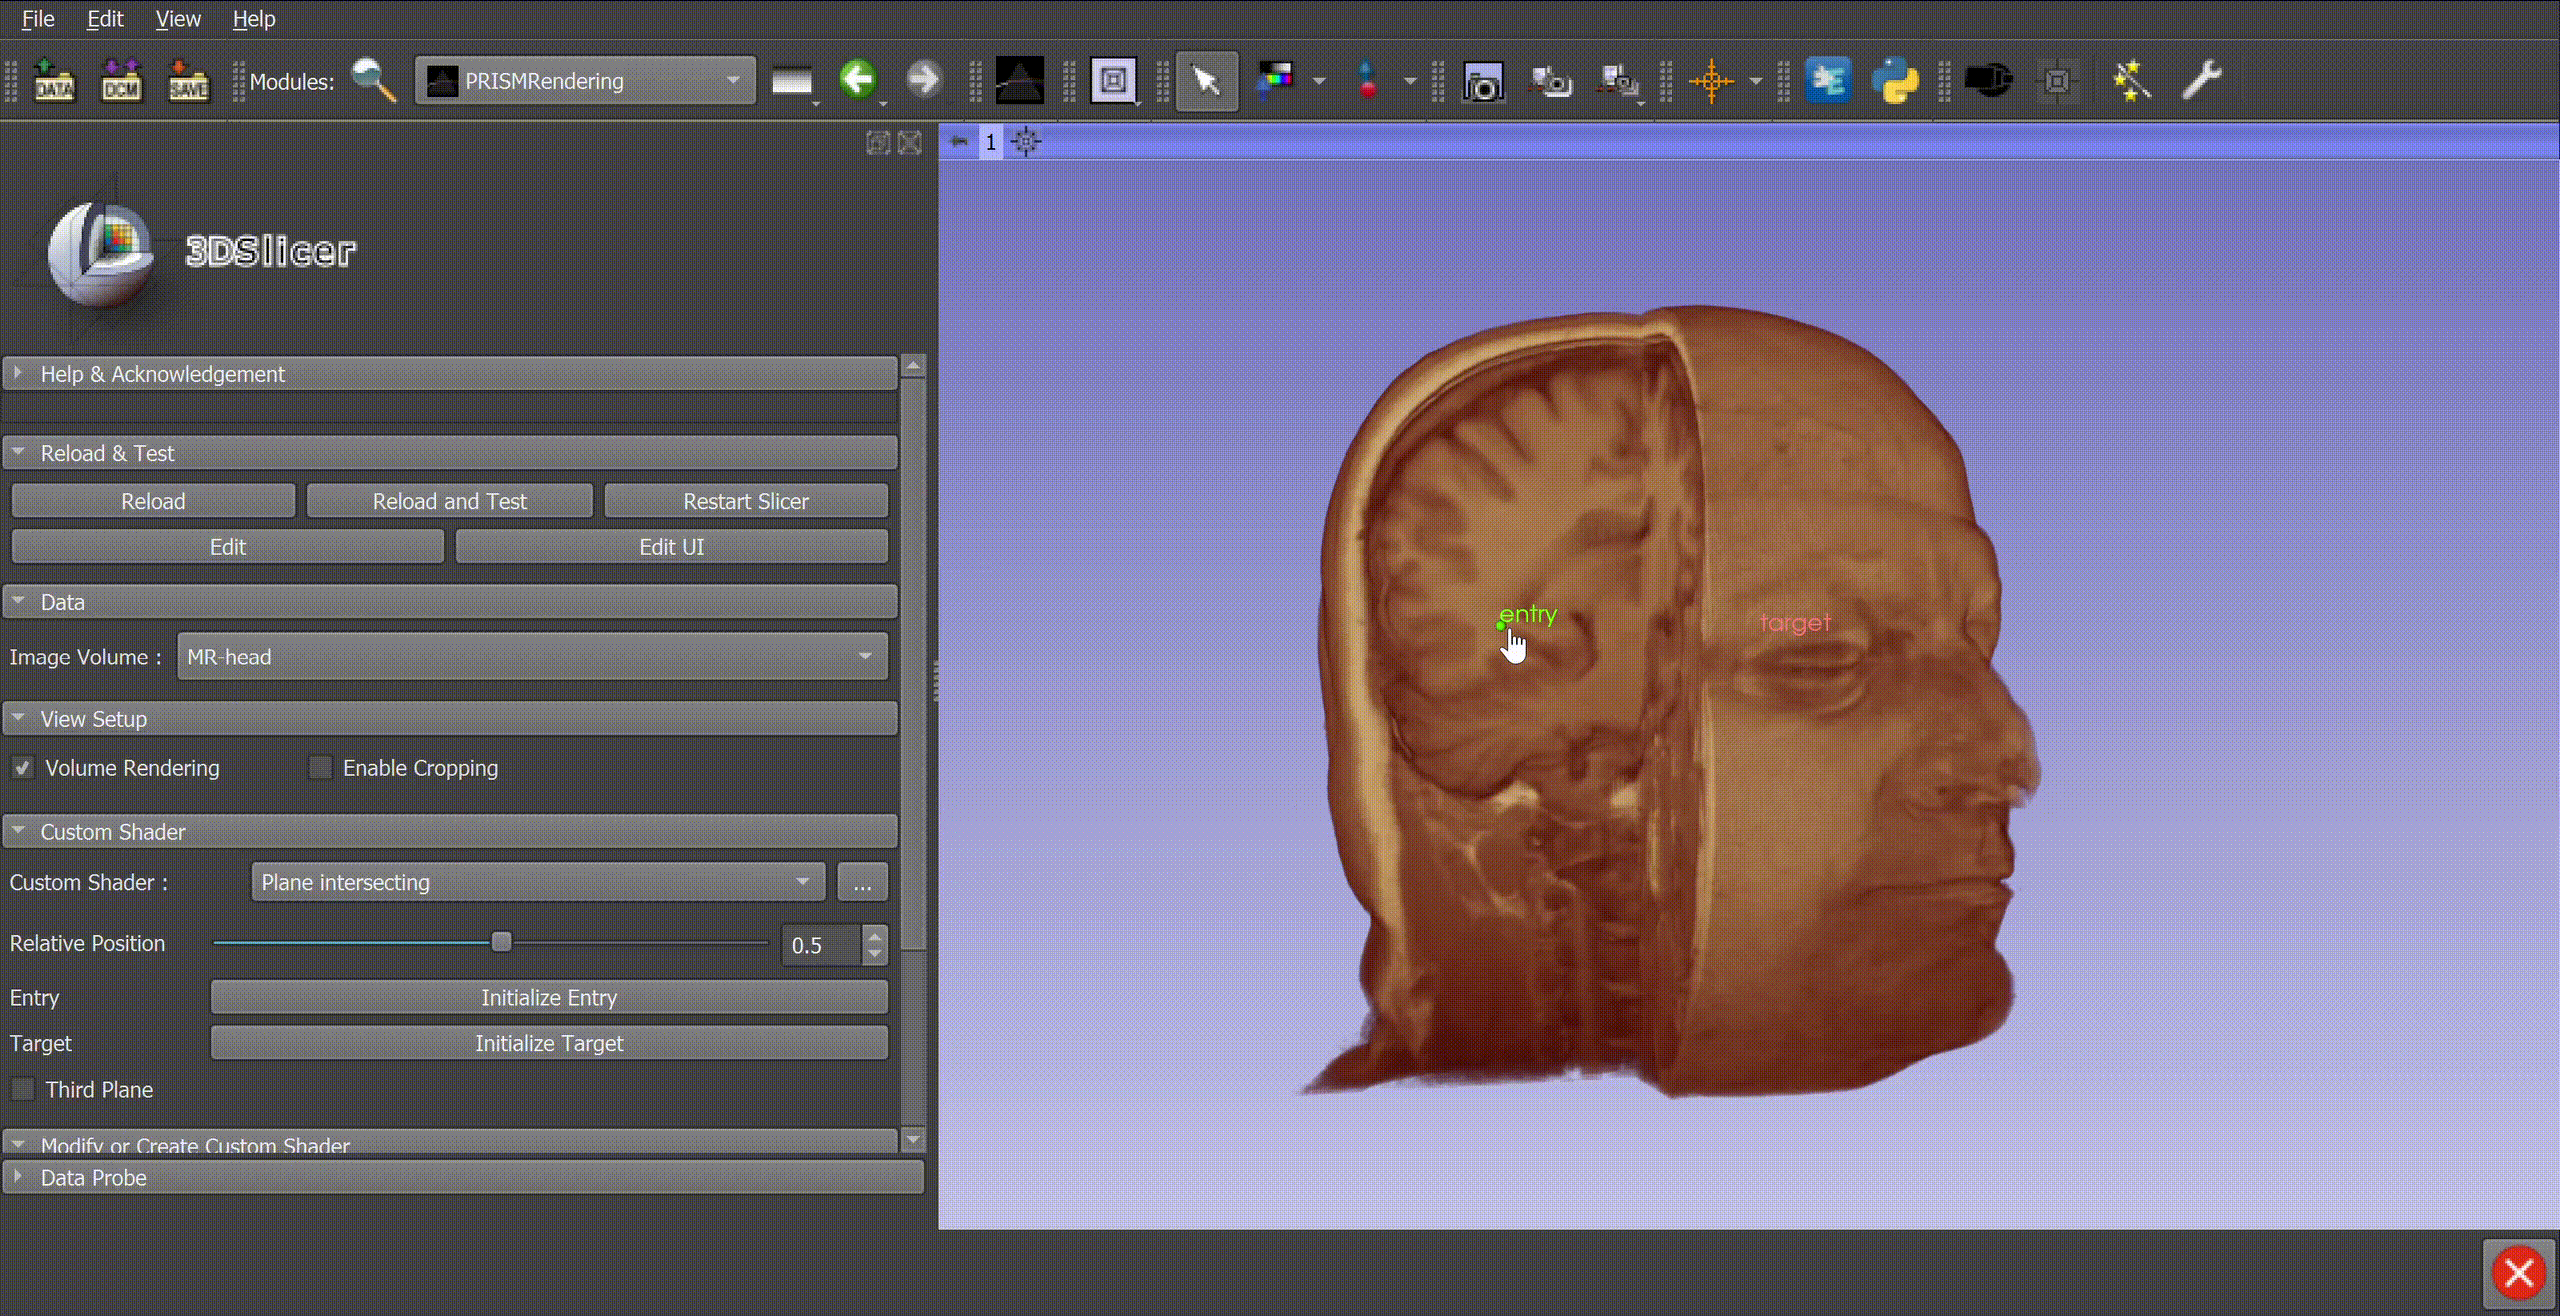
Enable/disable the use of a third plane.
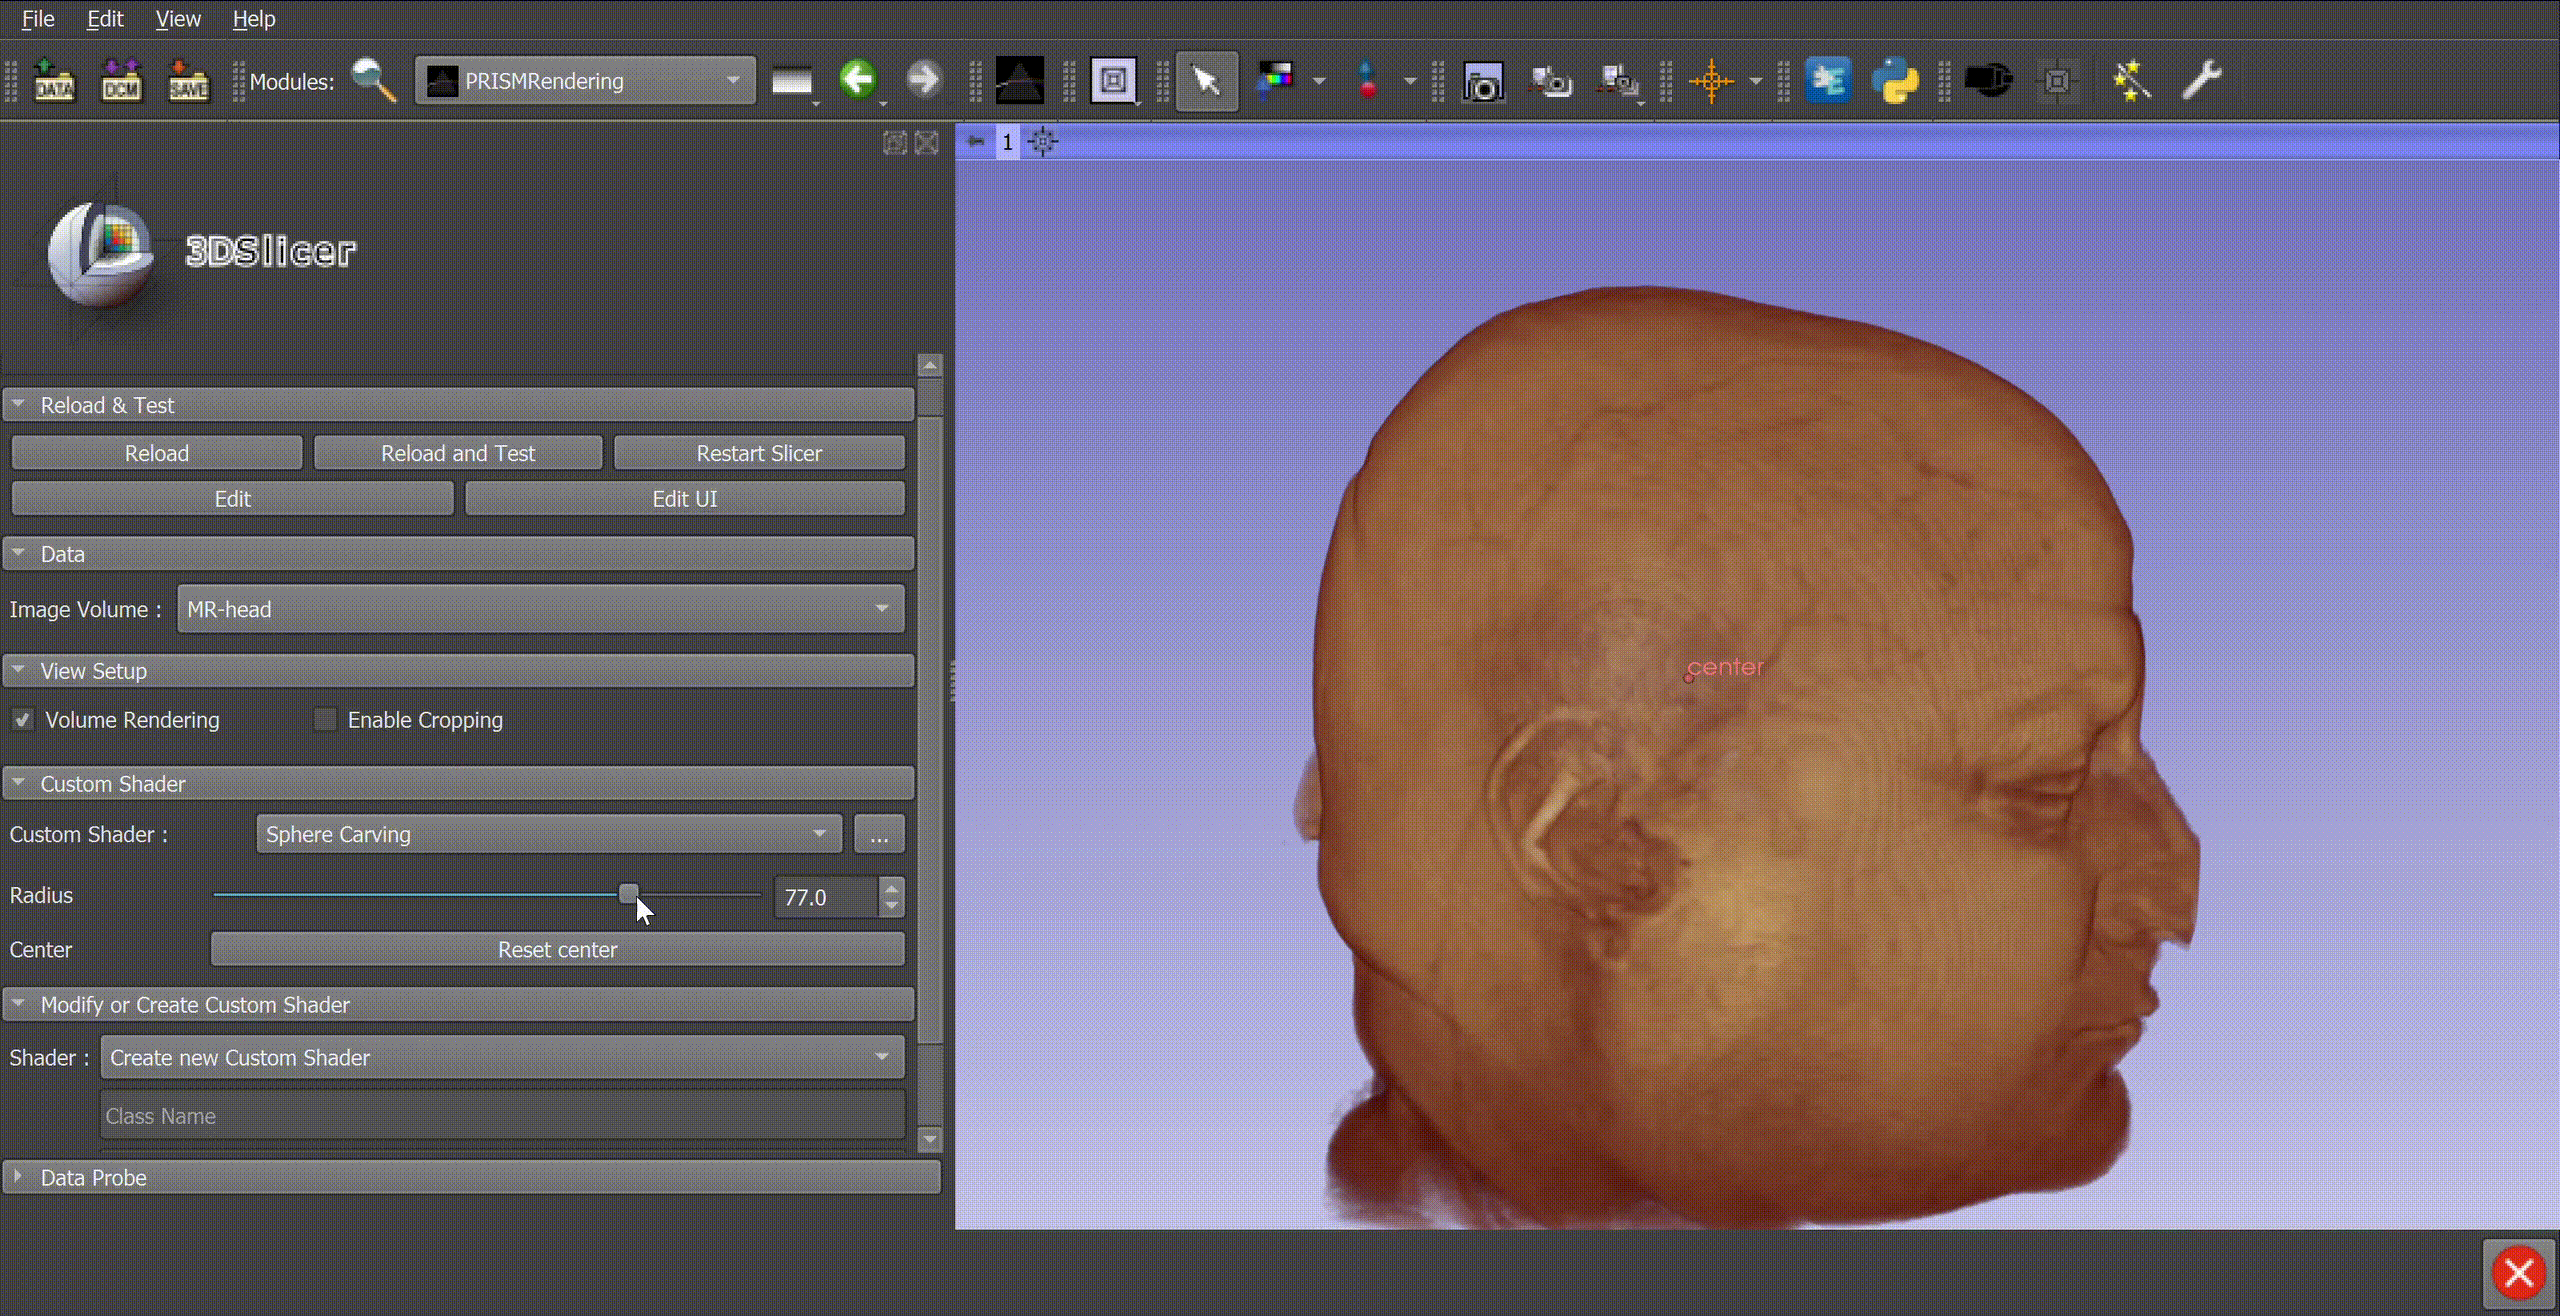
Sphere carving
This shader makes it possible to cut out spherical parts of the volume interactively, which can obstruct structures of interest with similar intensities.
You can download the sample volume by clicking here.
It is possible to :
Modify the position of the center of the sphere.
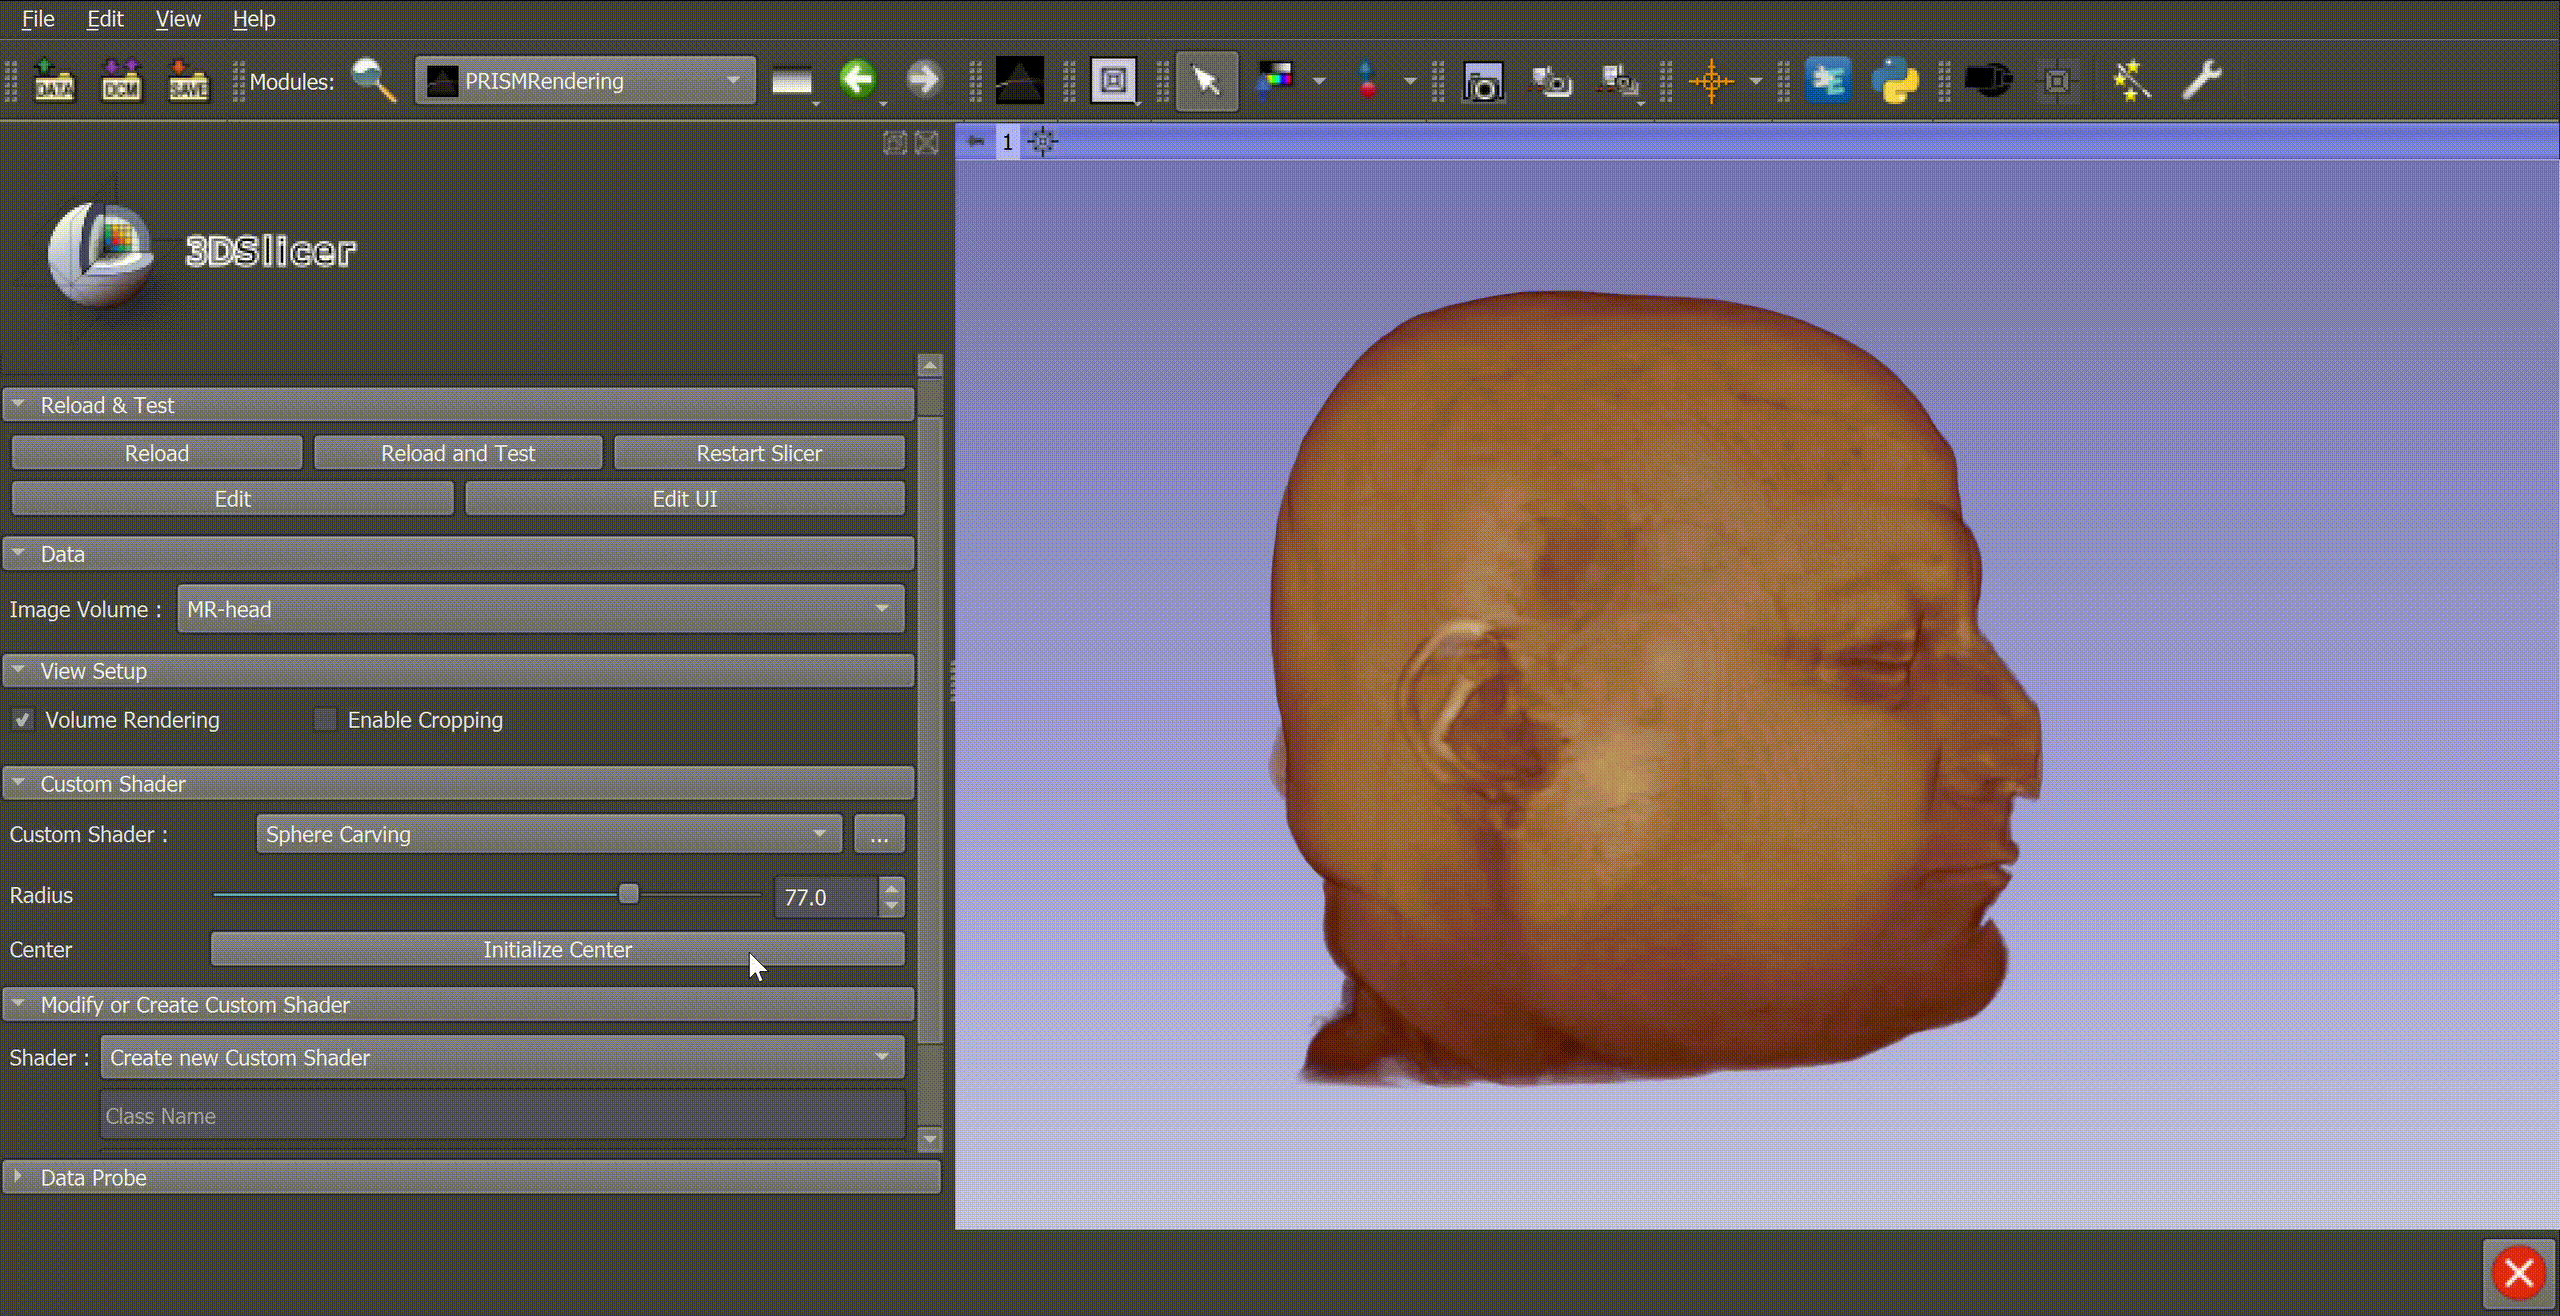
Modify the radius of the sphere.
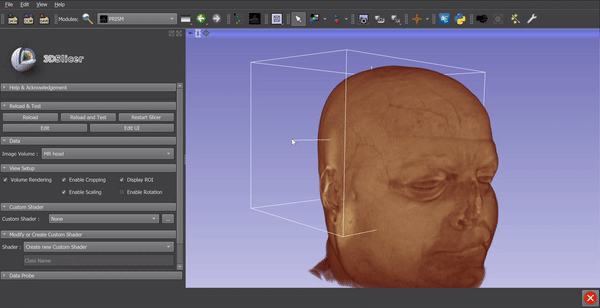
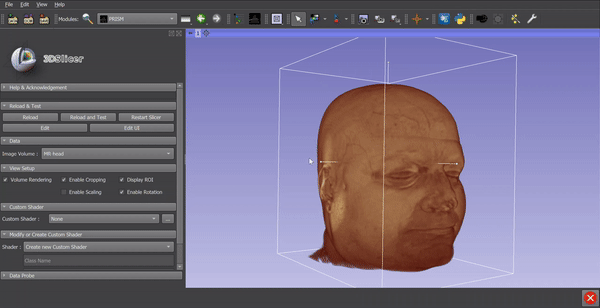
Modifying the ROI of a volume
Enable the cropping of the volume with the ROI by clicking on the “Enable Cropping” checkBox.

Display the ROI of the volume by clicking on the “Display ROI” checkBox.
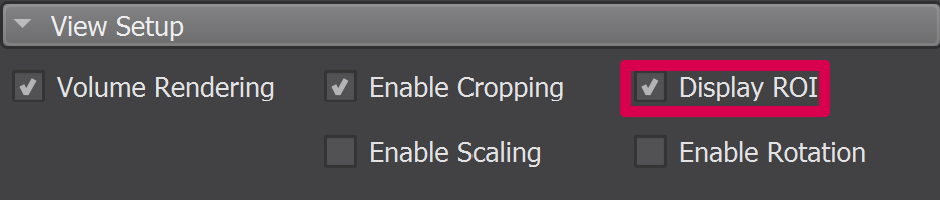
You can scale and rotate the ROI :
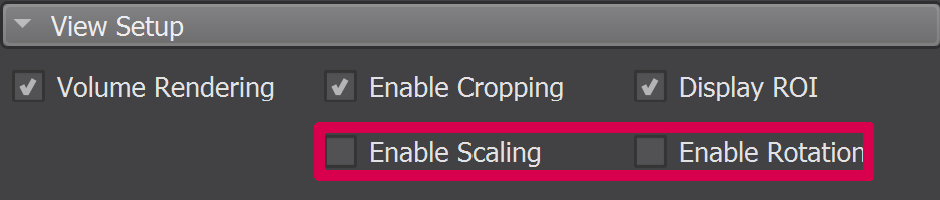
Scale the ROI :
- Enable the scalling of the ROI by clicking on the “Enable Rotation” checkBox.
- Select one of the handle of the ROI and move it towards the center or the outside of the volume to scale the ROI.
Rotate the ROI :
- Enable the rotation of the ROI by clicking on the “Enable Rotation” checkBox.
- Select one of the side of the ROI and move it in any direction to rotate the ROI.
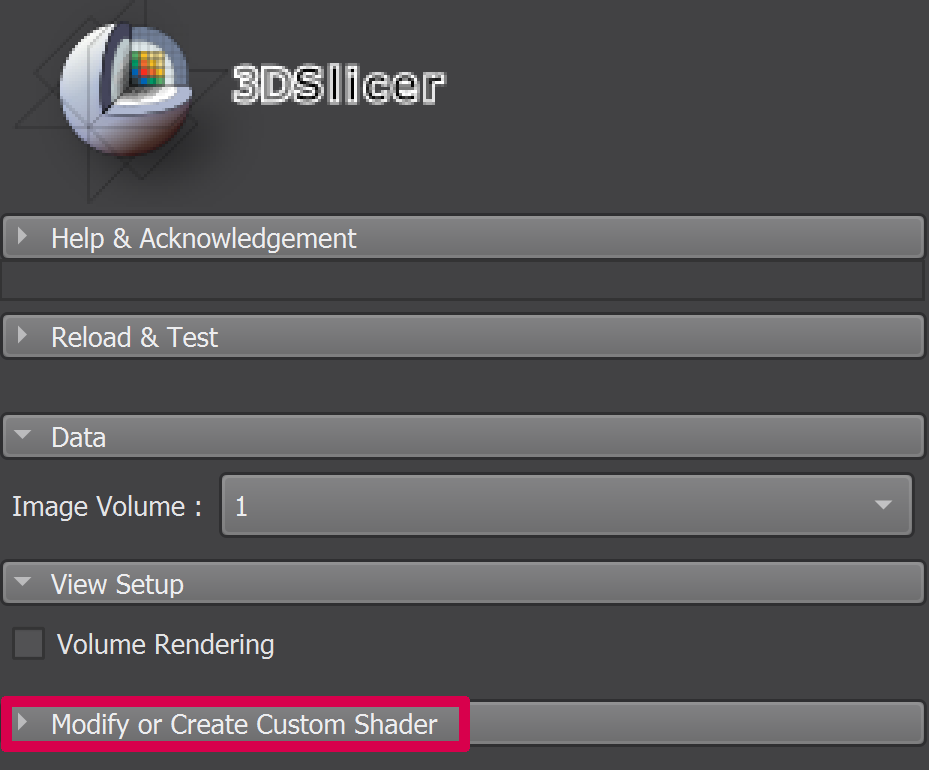
Creating a new shader
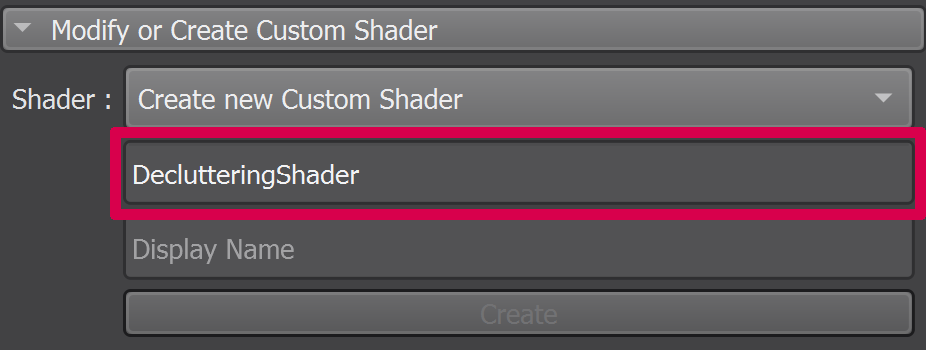
Open the “Modify or Create Custom Shader” section.

In the comboBox, select “Create new Custom Shader”.
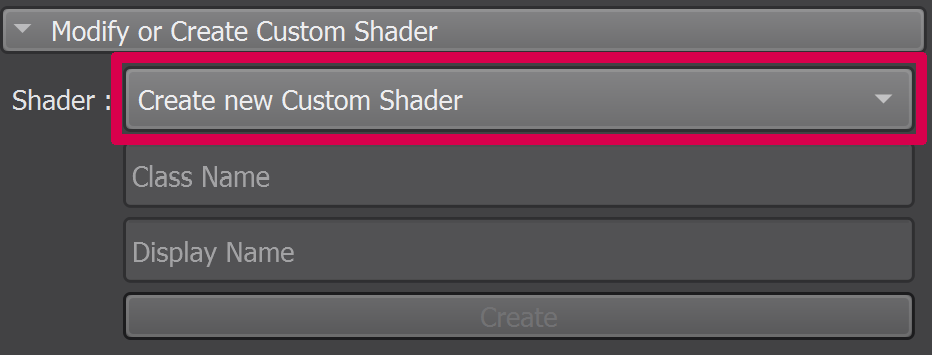
Type the name of the shader that will be used as a class name.
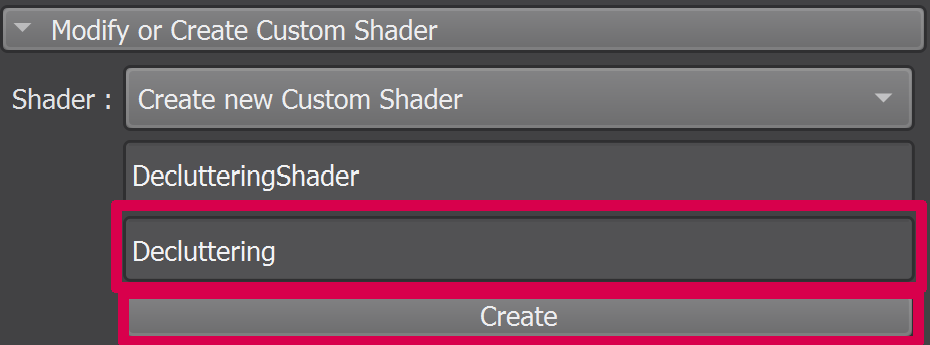
Type the display name of the shader that will be used in the UI.
Click the “Create” button.
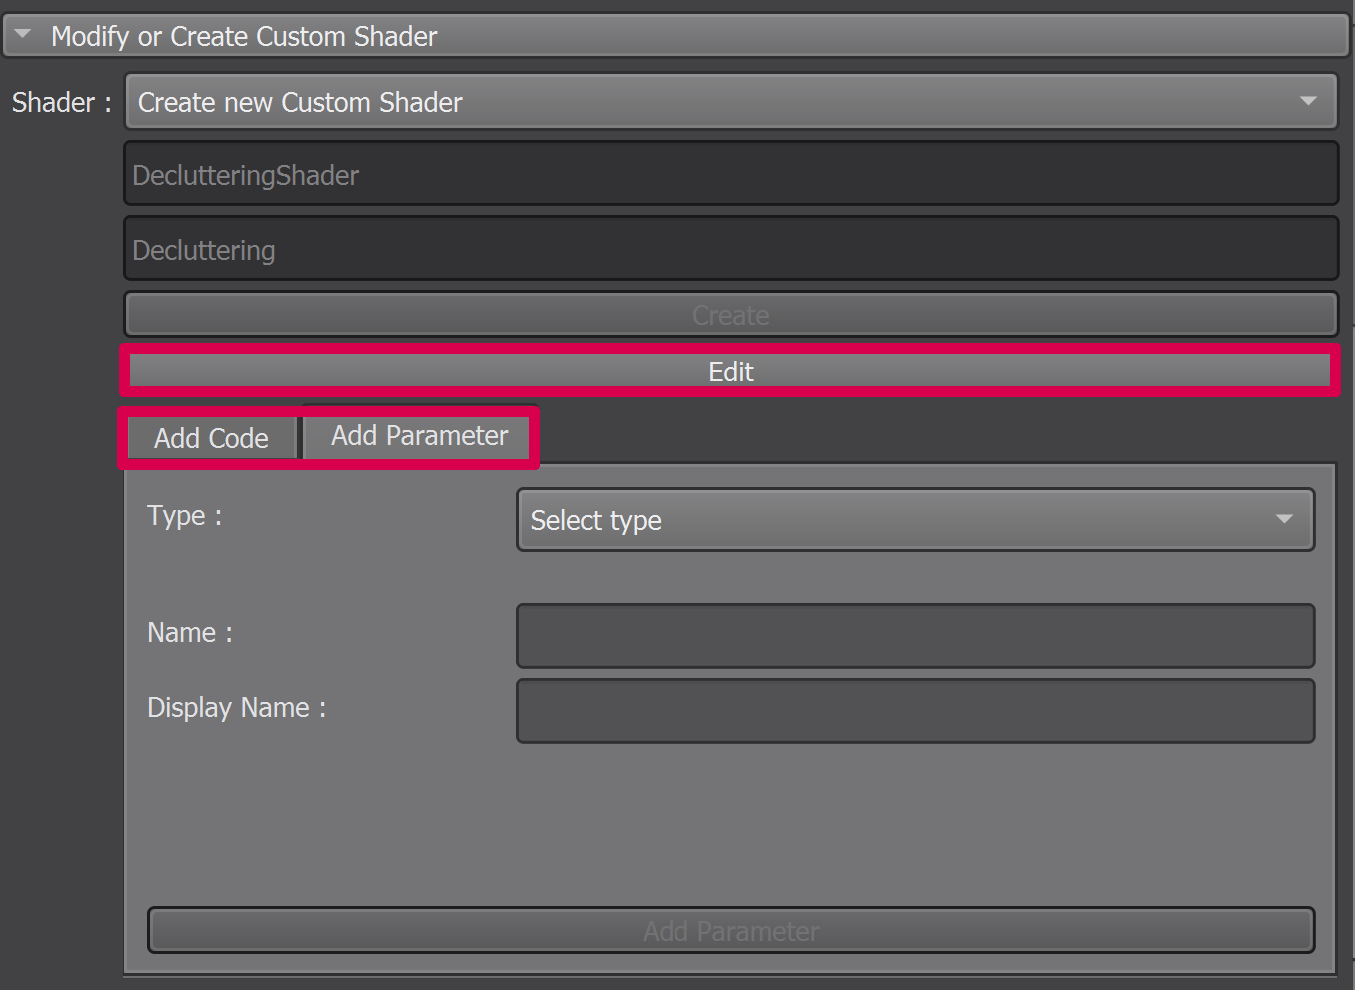
You can either :
Click on the “Edit” button and modify the python class manually.
Use the Add Code and Add Parameter tabs to modify the python class with the UI :
Modifying an existing shader
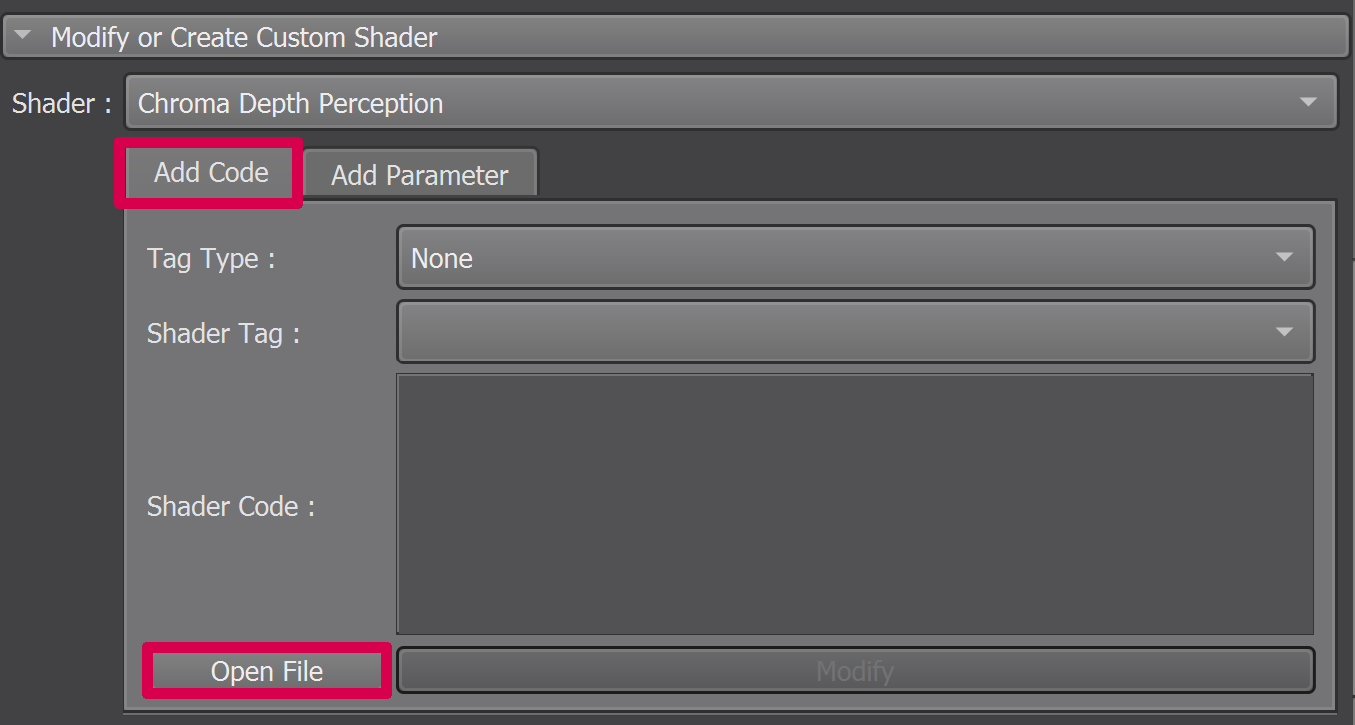
Currently, the only modification that can be done to an existing shader is to add sections of code or parameters. The code contained in the Python class can be modified either by clicking on the “Open File” button in the “Modify or Create Custom Shader” section :
 or by clicking on the “Open” button in the “Custom Shader” section :

Open “Modify or Create Custom Shader” section.
In the comboBox, select the shader to modify.

Use the Add Code and Add Parameter tabs to modify the python class UI :
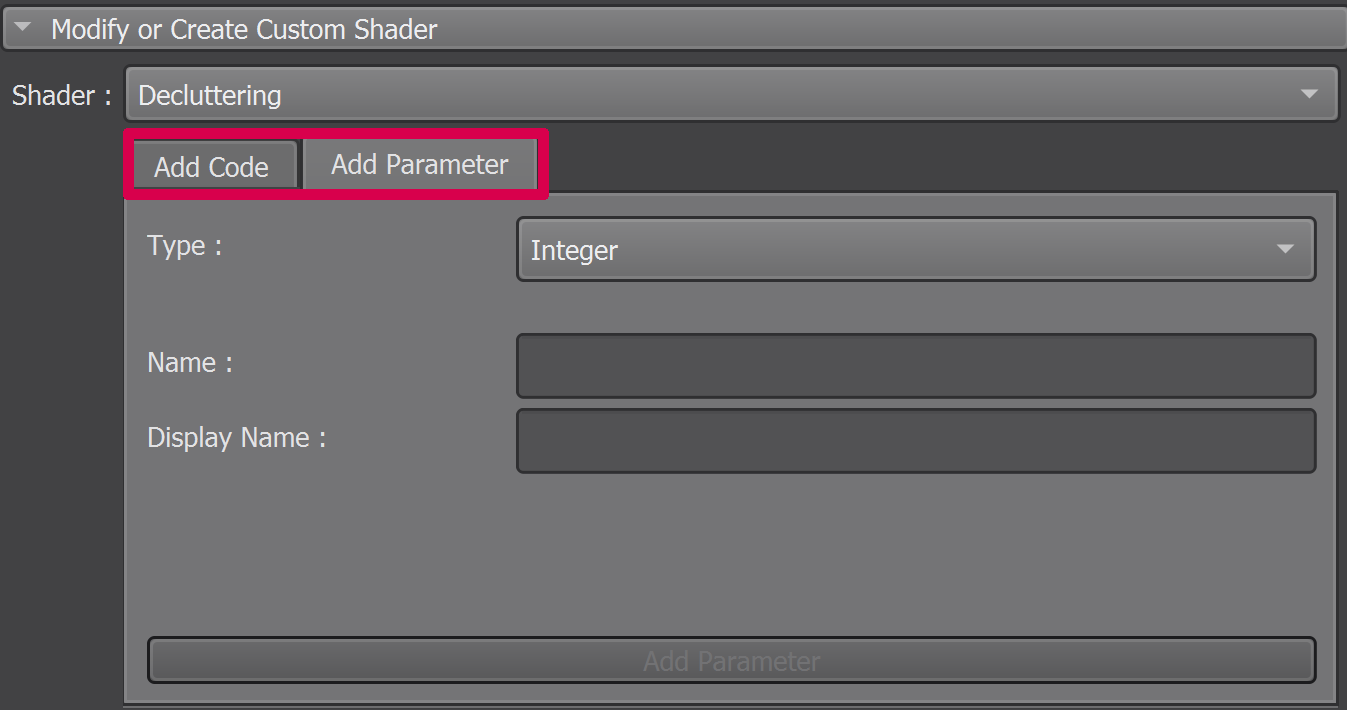
Adding a parameter to a shader from the UI
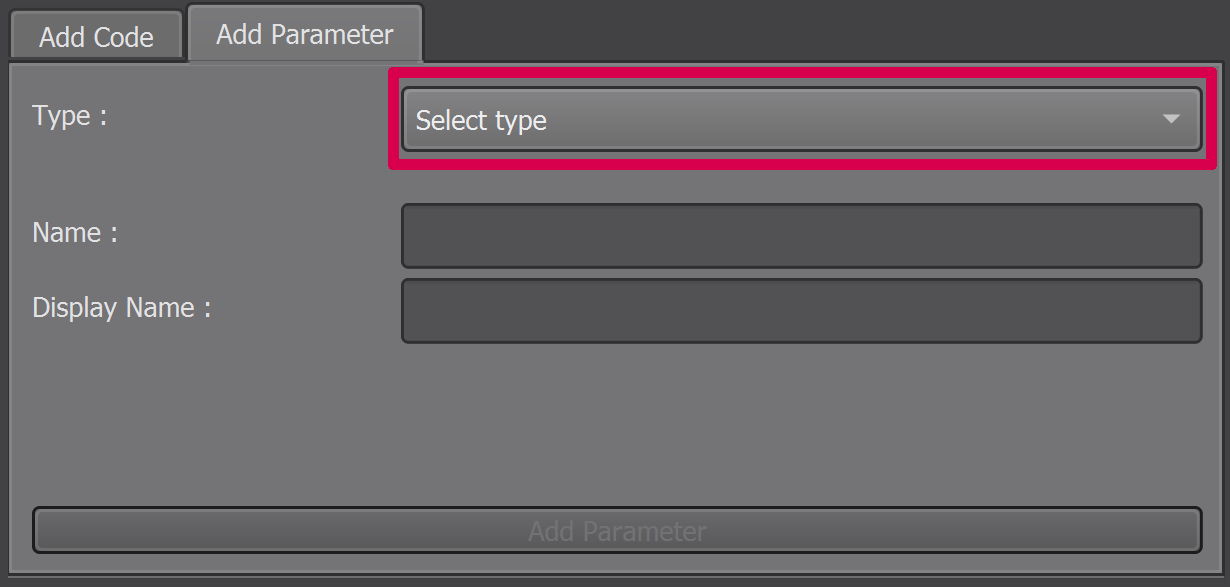
In the comboBox, select the type of the parameter to add to the shader.
Type the name of the parameter that will be used inside the shader.
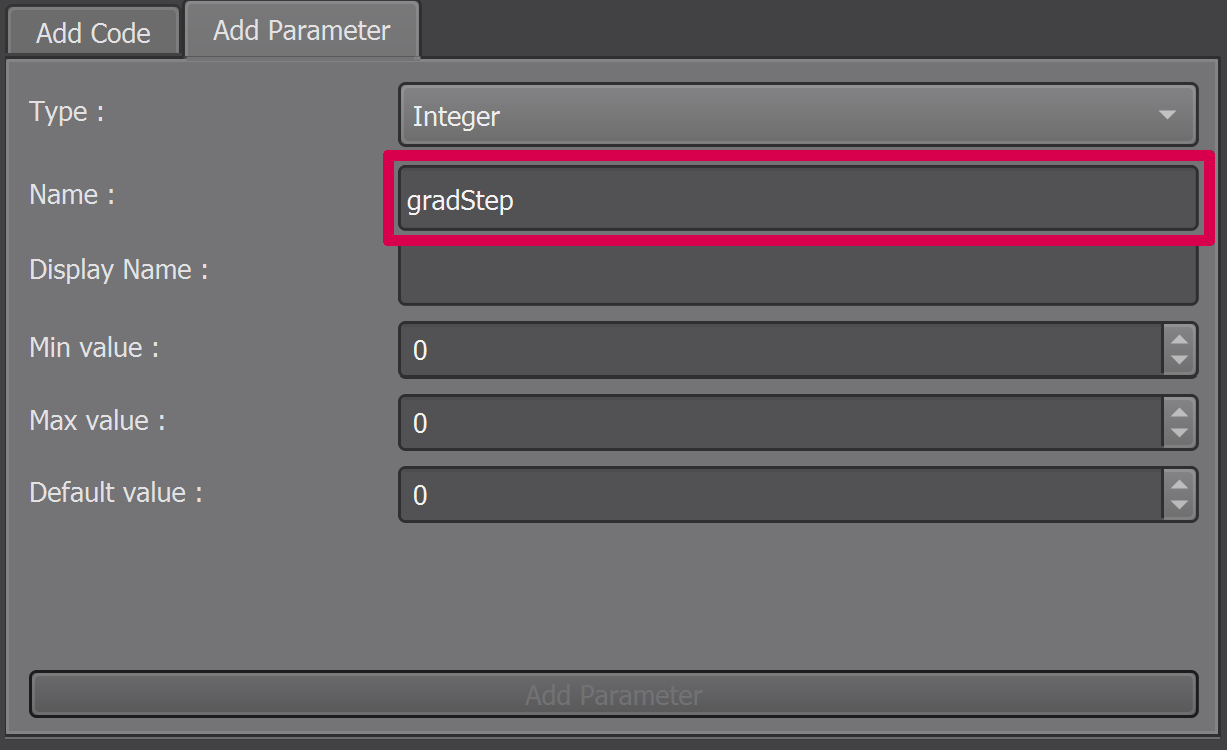
Type the display name of the parameter that will be used in the UI.
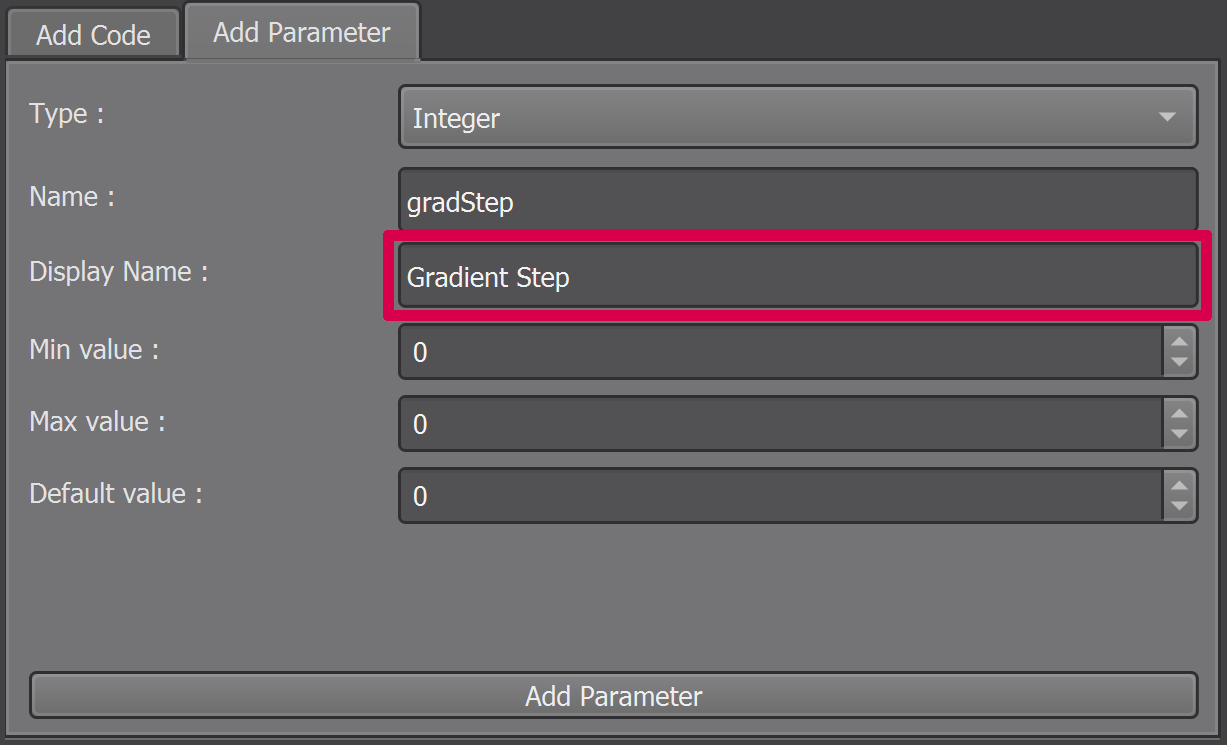
Modify the values according to the parameter.
Click the “Add Parameter” button.
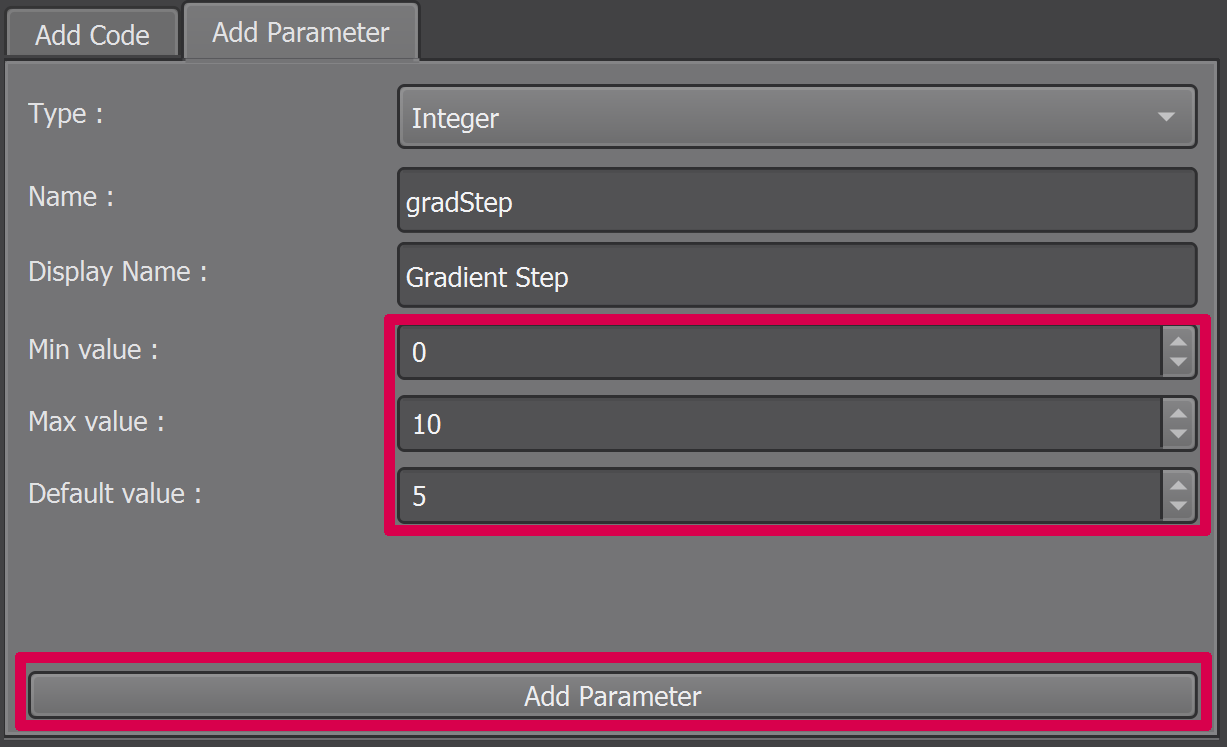
Repeat steps 1-5 for each wanted parameter.
Adding code to a shader from the UI
In the first comboBox, select the tag type of the code to be added to the shader.
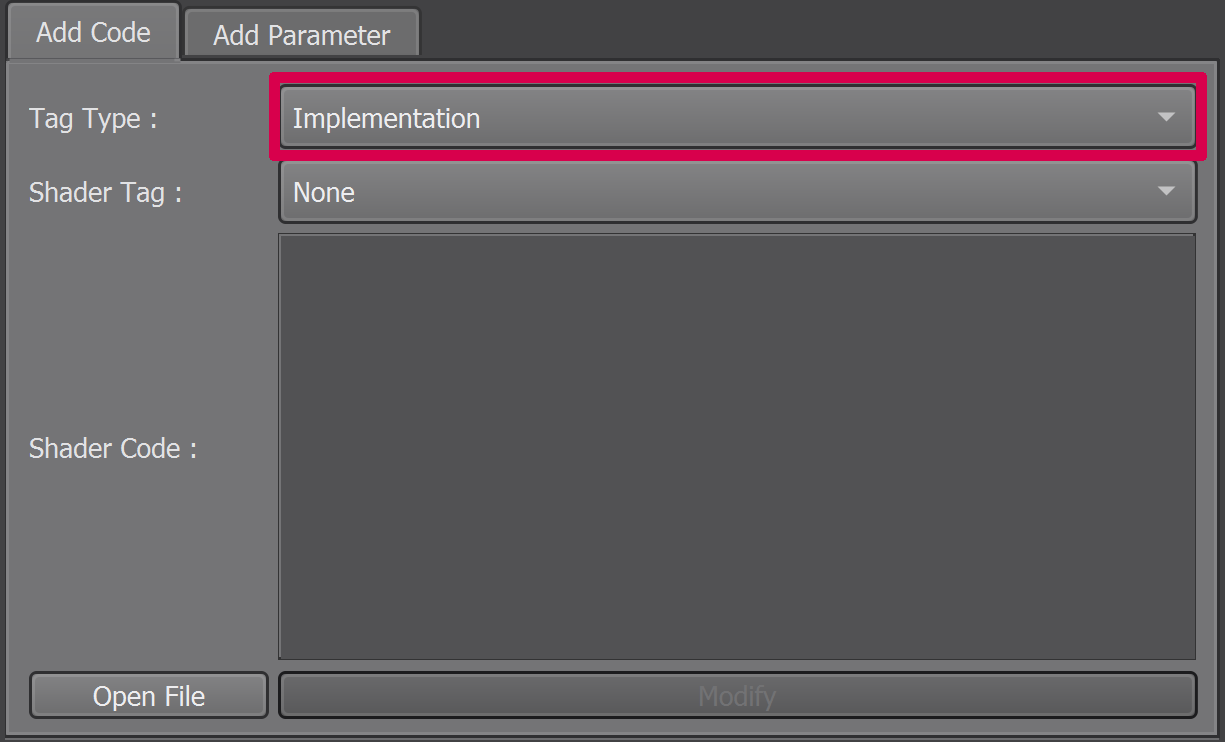
In the second comboBox, select the tag of the code to be added to the shader.
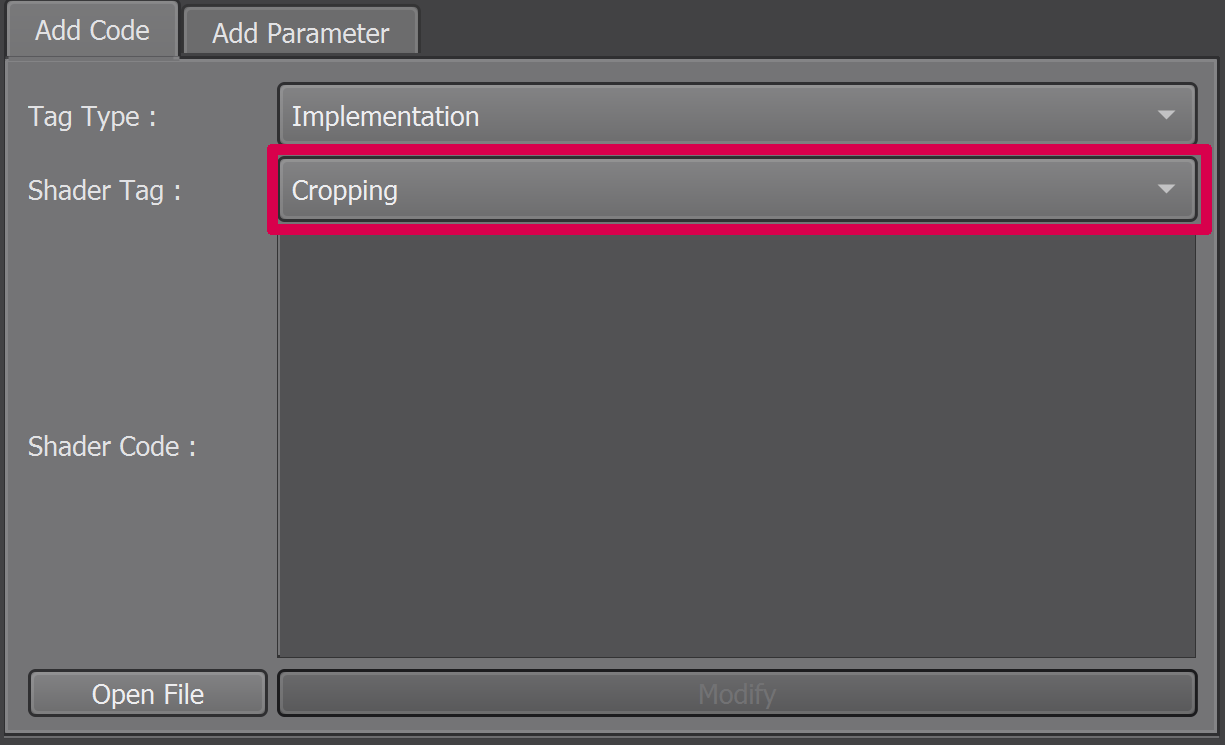
To add the code you can either :

- Enter the code in the text area and click on the “Modify” button.
- Click on the “Open File” button to enter the code directly in the python file.
Repeat steps 1-3 for each wanted code replacement.